

Before you start
Your store must be configured to use this feature. Enforced receiving is part of the Early Access Program. See this article for more information on EAP features, Early Access Program.
How To
How do I create a store-to-store transfer that requires the destination store to physically receive the product?
Follow these steps
This alternate store-to-store transfer process is used to enforce a receiving process instead of automatically placing the inventory in the destination store. This process is suggested for regulated markets such as cannabis.
With this store-to-store transfer method:
- A transfer is generated in the origin store (the store where inventory is coming from).
- The transfer is sent to the destination store and held in an in transit inventory location.
- The destination store scans and receives each item.
- When the destination store confirms the receipt of goods, the inventory is moved from the in transit location to the main inventory.
To process a store to store transfer with enforced product receiving, follow these steps.
Create the transfer in the origin store
The transfer is created in the origin store. Sending the transfer removes the inventory from this store's main inventory location and into the destination store's in transit inventory location.
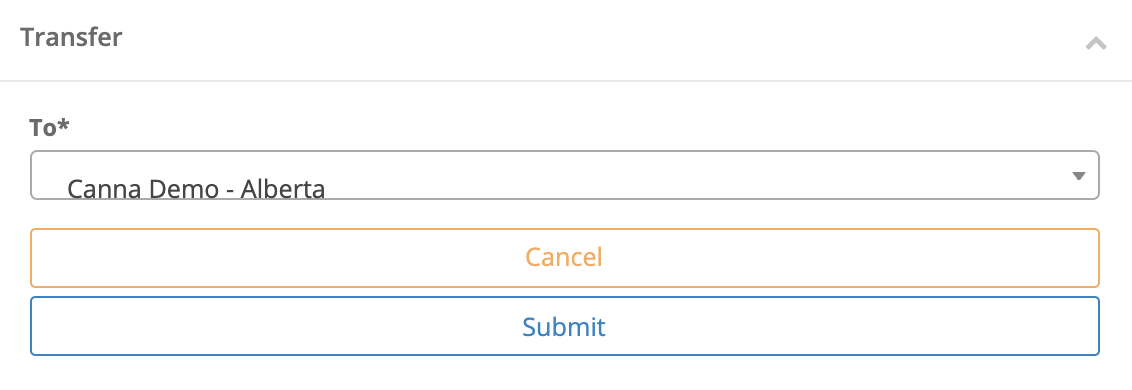
- In the origin store, select Products > Transfers. From the Actions menu, select New Transfer.

- Select the destination store from the dropdown menu and select Submit. This is the store that is receiving the transfer.
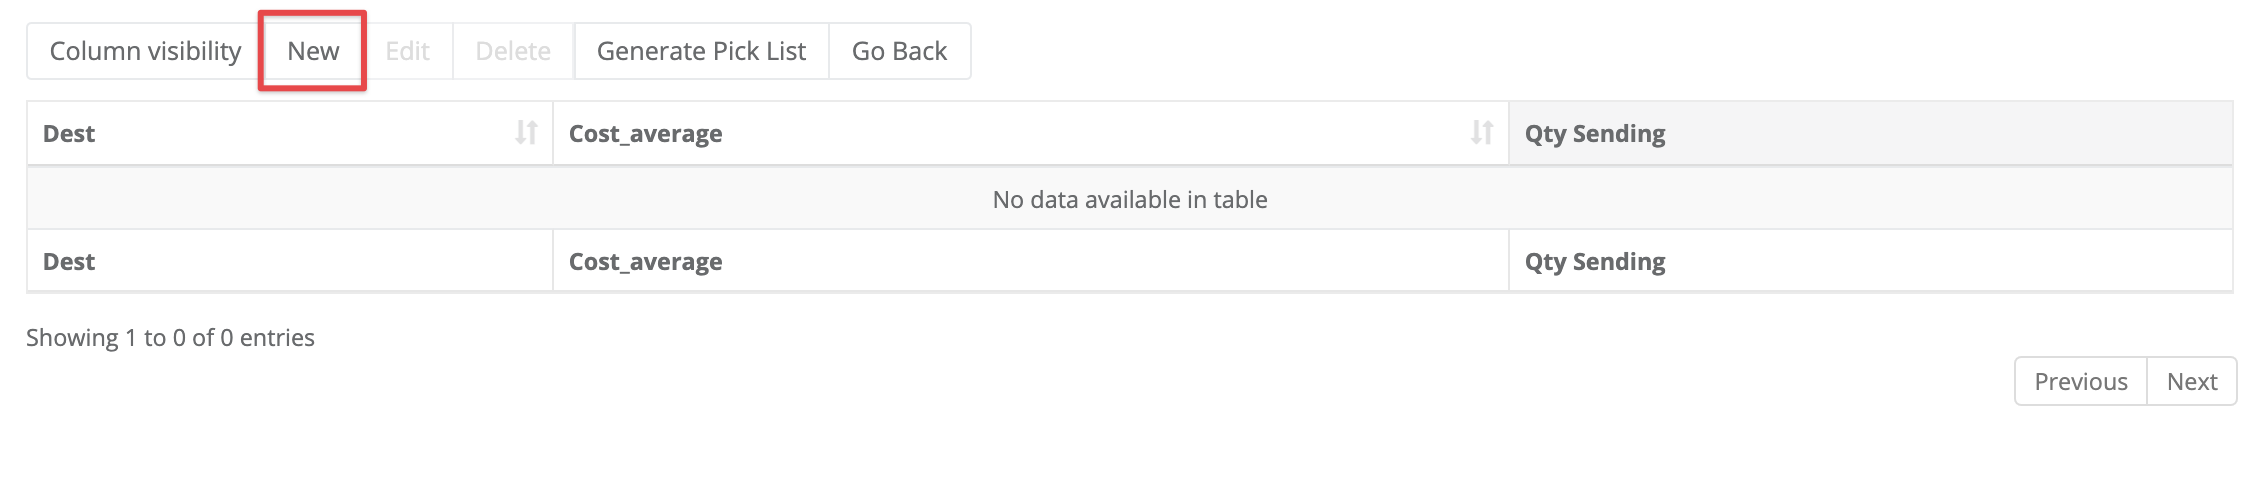
- To add a product to the transfer, select New.
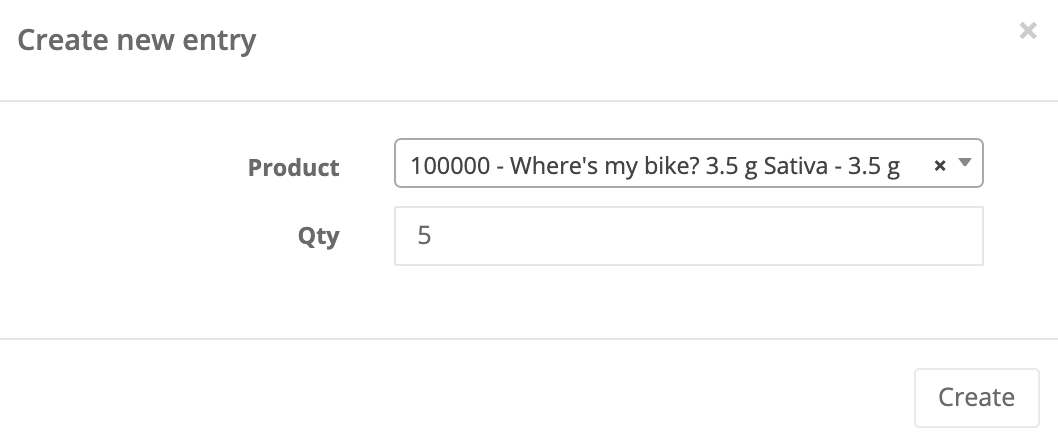
- Select the product from the dropdown menu and enter the quantity, in units, to add to the transfer. Select Create.
Heads up
The transfer of product requires the SKU to exist in both the origin and destination store. If a product is missing from the dropdown down menu, ensure that it exists in the destination store.
- After all items are added to the transfer, select Go Back.

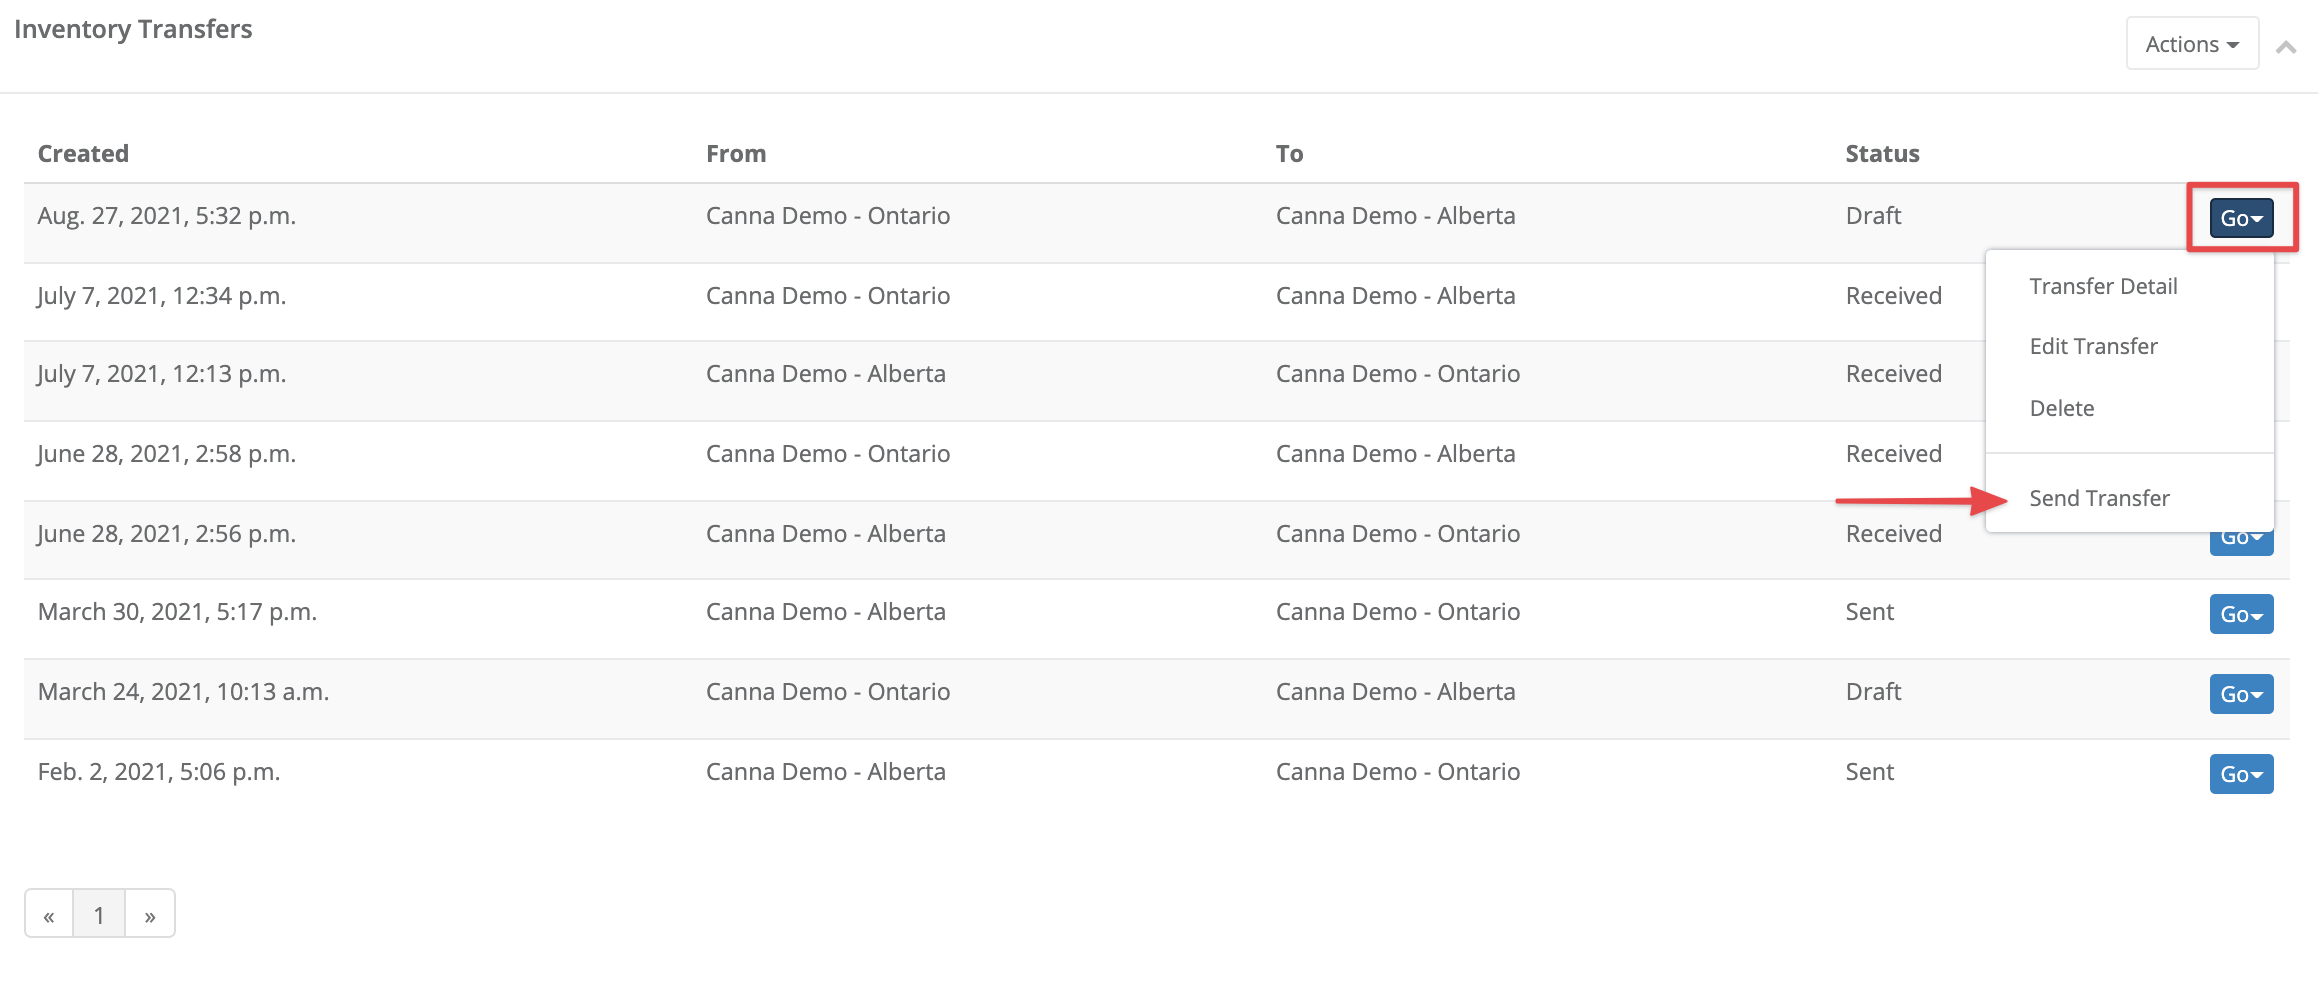
- Select the Go menu beside the transfer you just created, then select Send Transfer.
Heads up
You cannot reverse a transfer once sent, verify all products and quantity before sending the transfer. If you transfer product in error, then the destination store must send the product back to you.
Receive the transfer in the destination store
The products are now in the destination store's in transit inventory location. Receiving the transfer moves the products out of the in transit location and into the main inventory location.
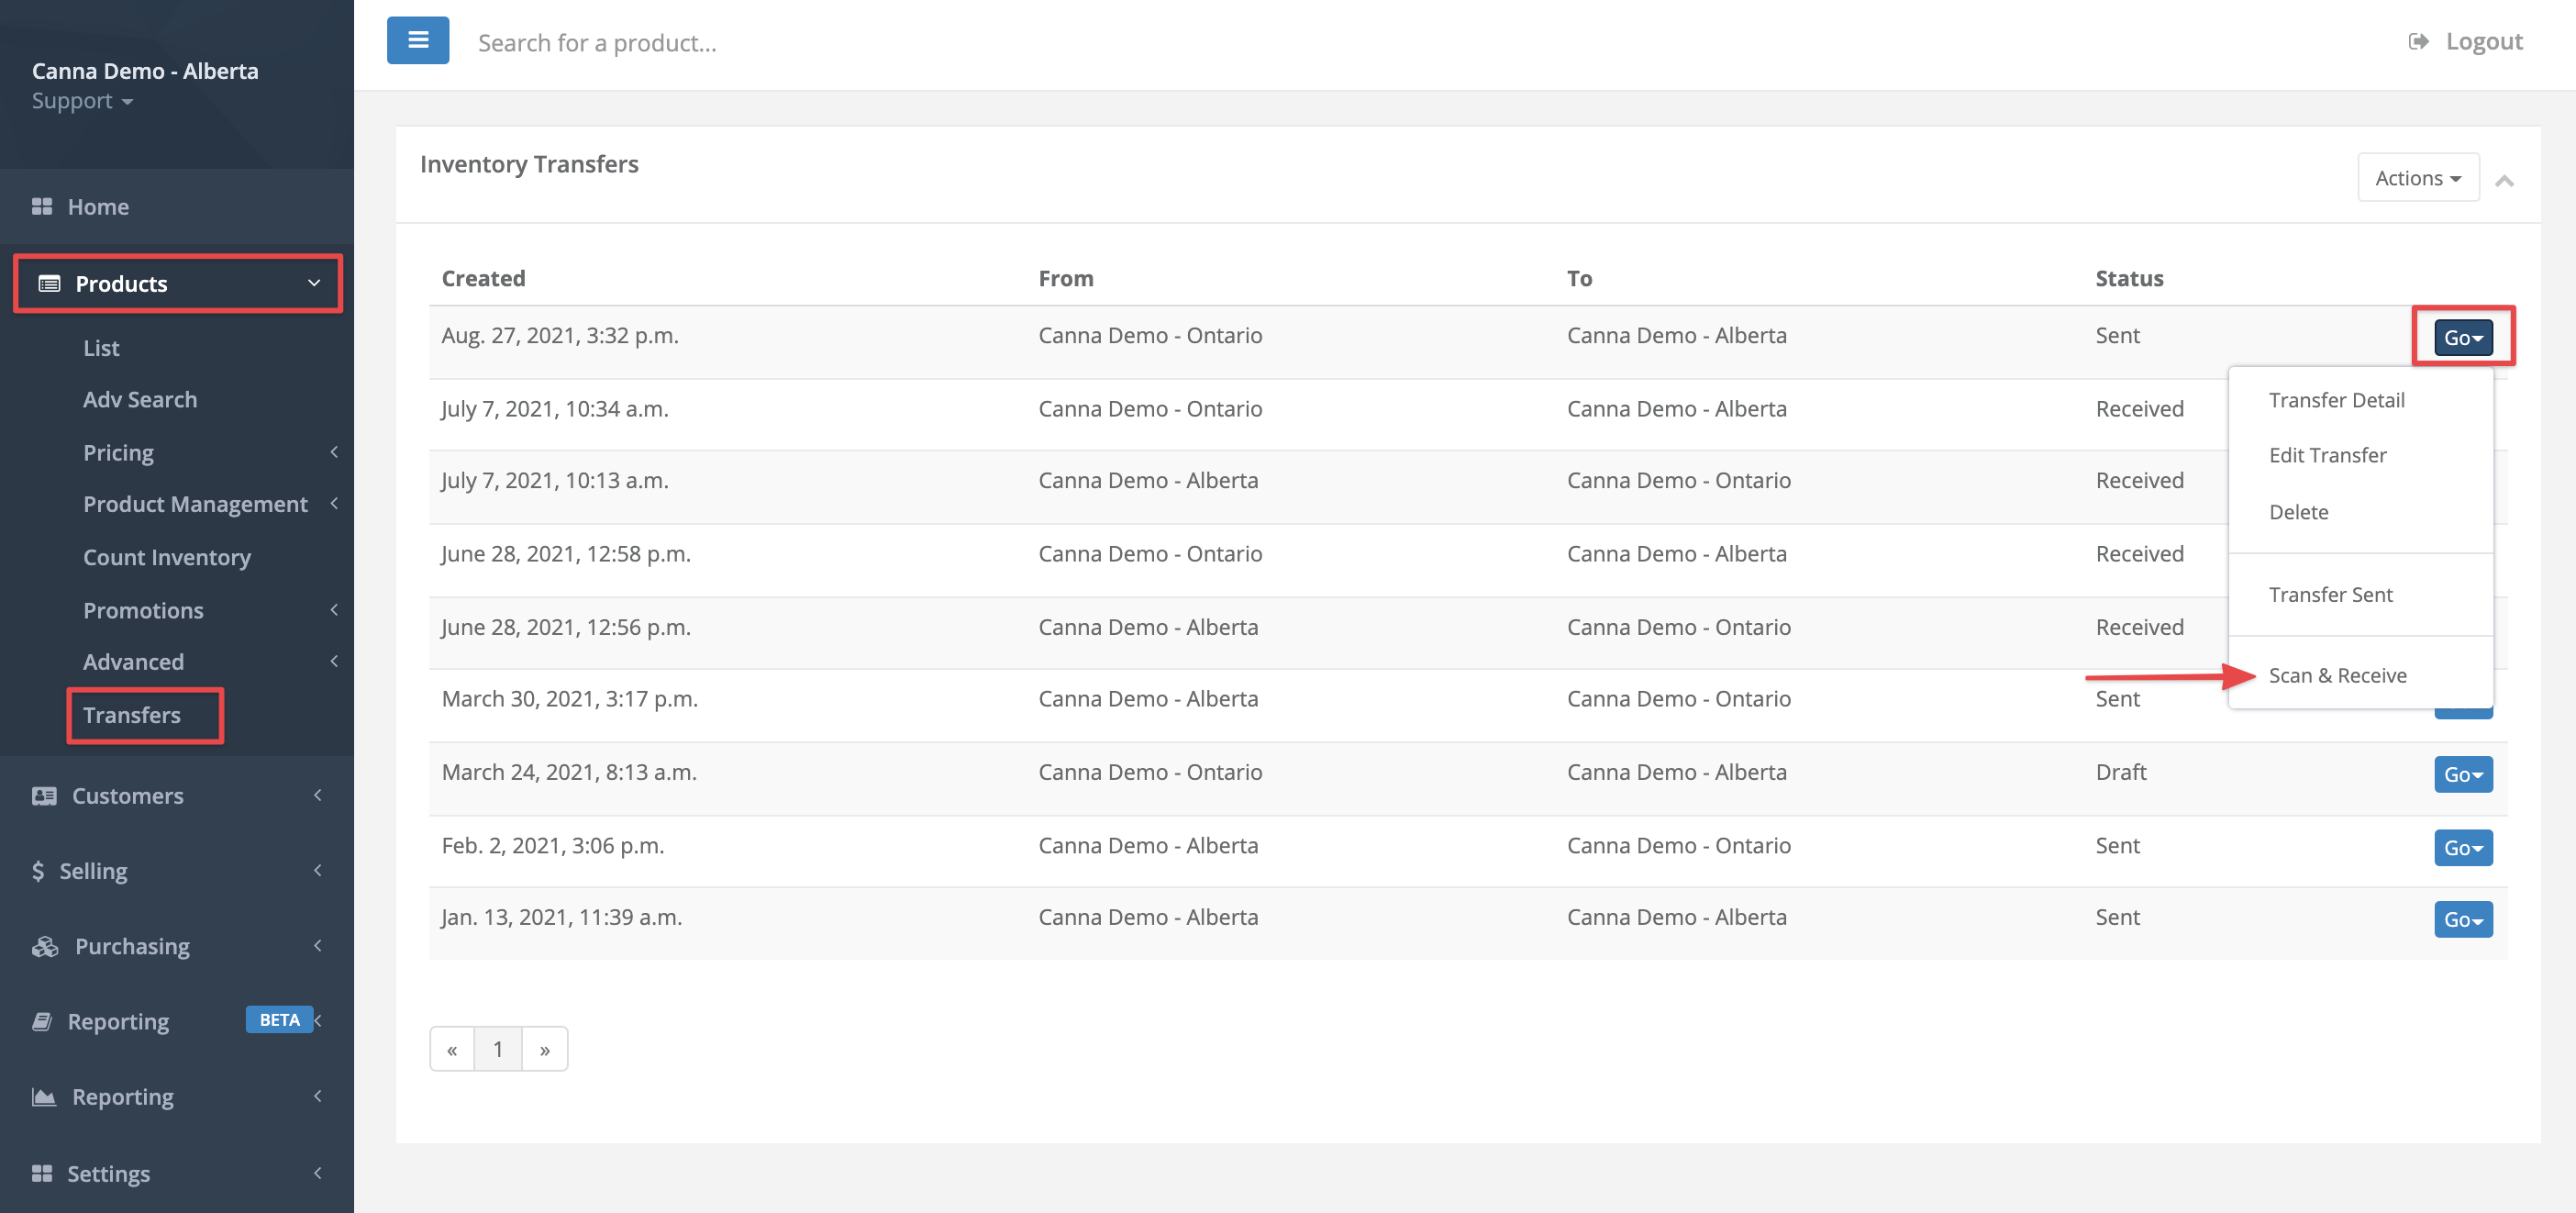
- In the destination store, select Products > Transfers.
- Select the Go menu beside the transfer you wish to receive, then select Scan & Receive.
- Scan the barcode into the Barcode field, enter the quantity and press enter to record the count.
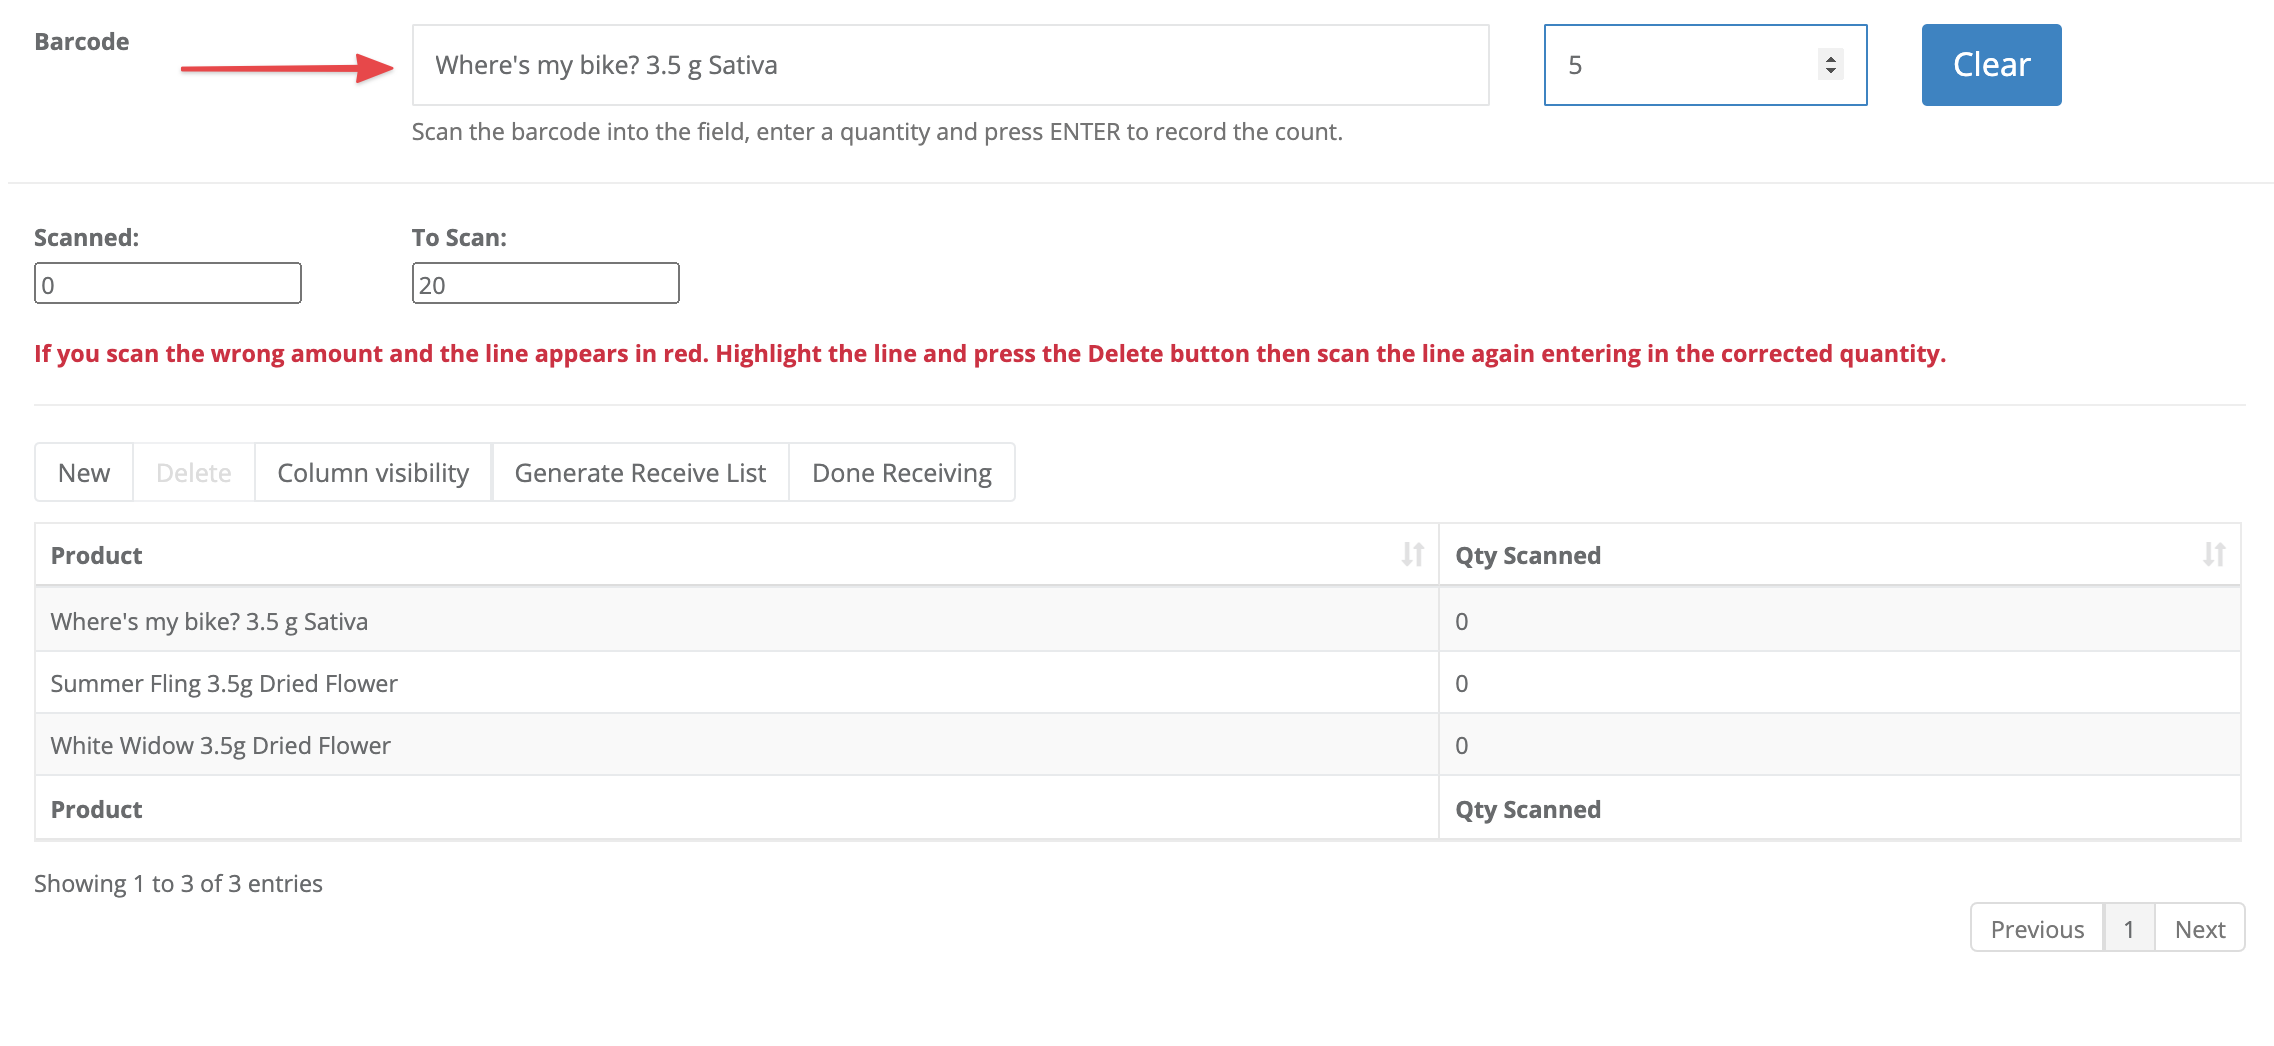
- Repeat the process for each item in the transfer.
-
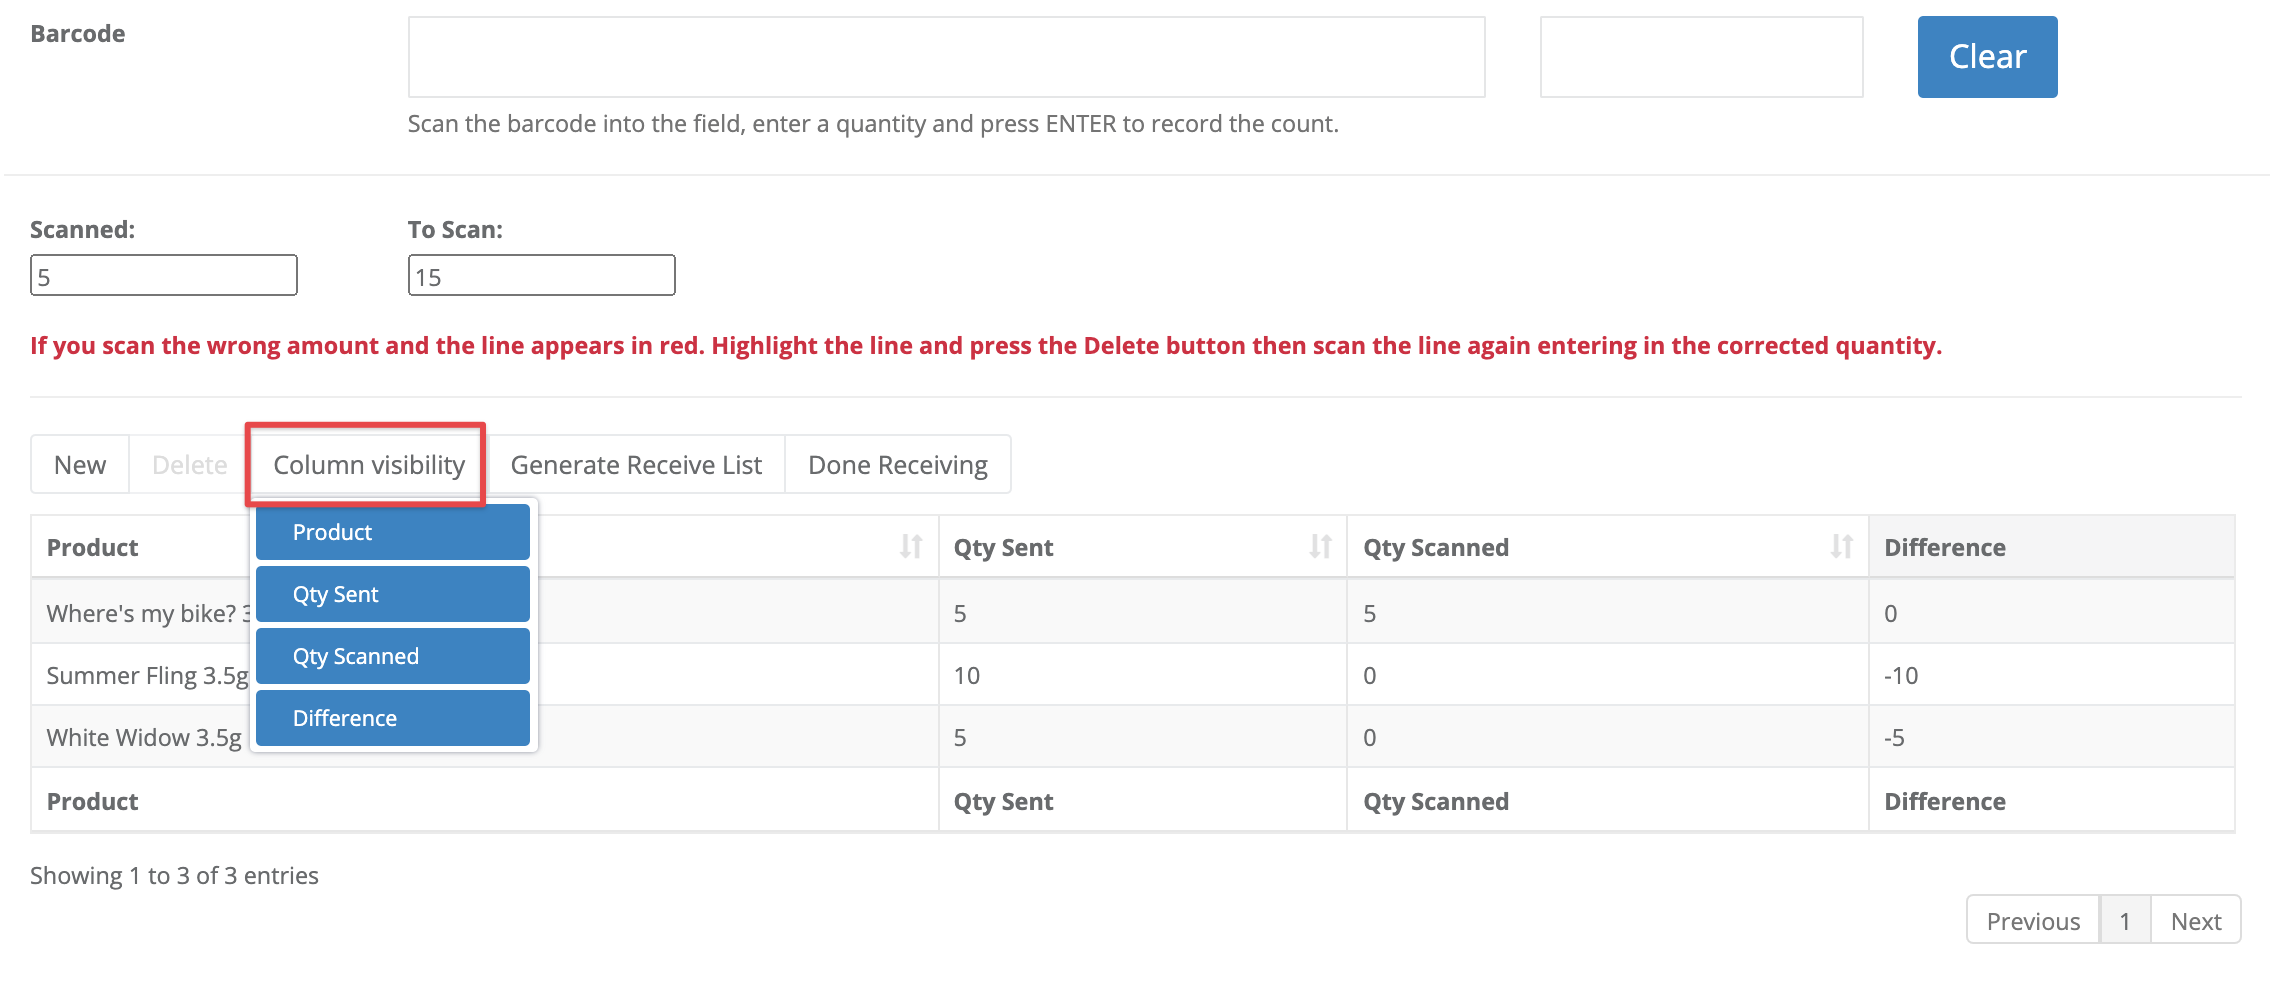
Optional: Use the Column Visibility button to add headers to the UI and ensure the quantity sent matches the quantity scanned.
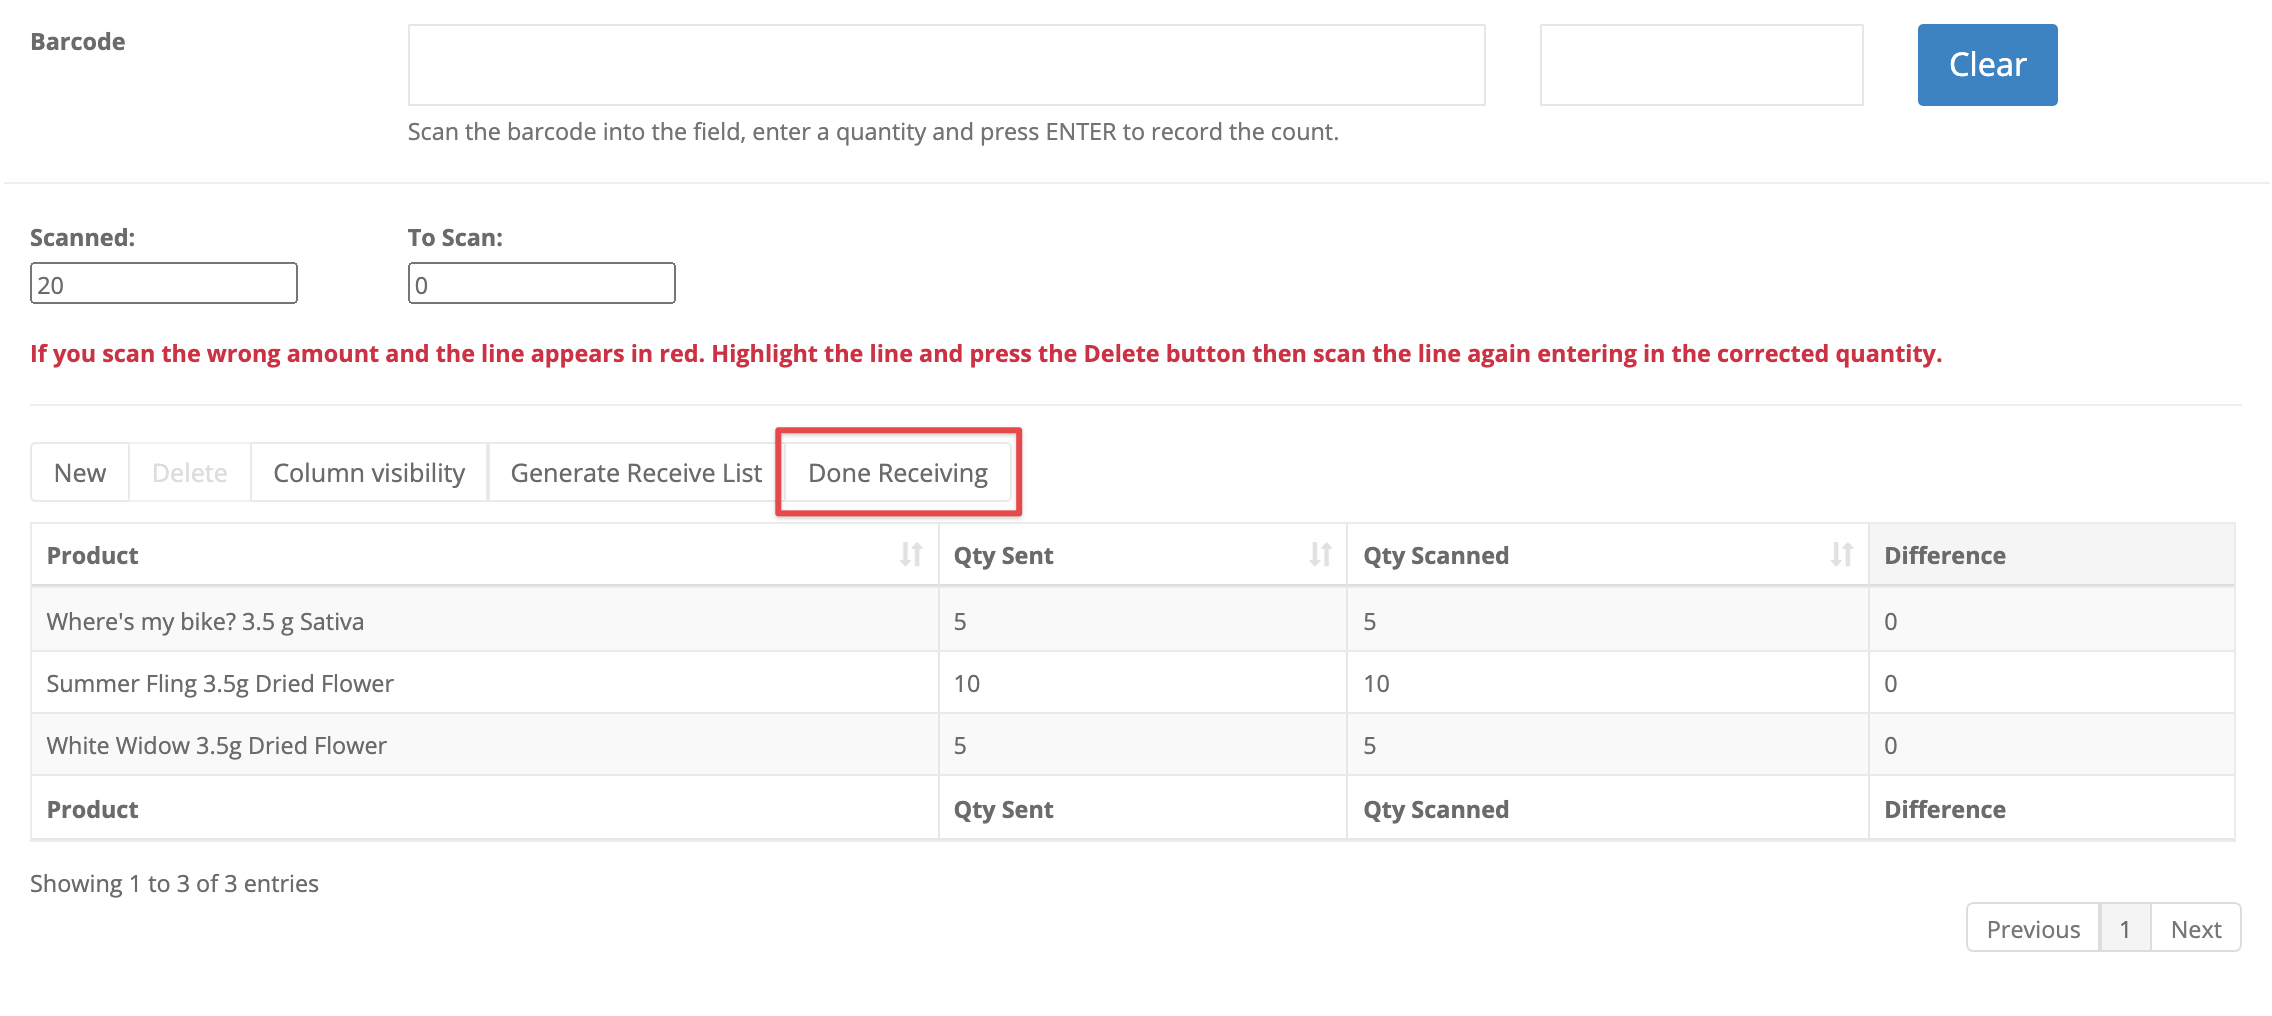
- Once all items have been scanned and received, select Done Receiving to move the inventory from the in transit to the main inventory location.
Heads up
Verify you have received all items on the transfer correctly. Transfers are not reversible. Corrections can only be made by transferring stock back to the origin store.
Comments
Please sign in to leave a comment.