

Heads up
The Visual Template Editor is part of the Early Access Program. See this article for more information on EAP features, Early Access Program.
How To
How do I set up a shelf label in Visual Template Editor?
Follow these steps
Visual Template Editor is designed with a drag-and-drop interface to simplify label creation. To set up a customized shelf label, follow these steps.
1. Create the label
- Select Settings > Advanced > Template Manager.
- Select Actions > Create New Template.

- Name your template and select Label Template as the type. Then select Submit to return to the template listing.
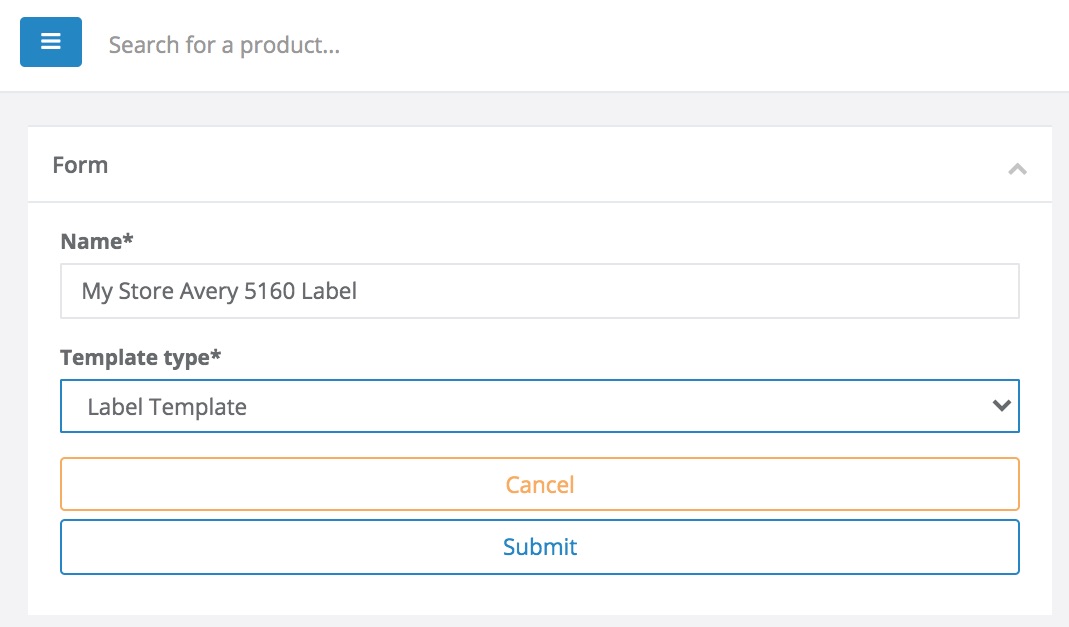
- Select the pencil icon next to the template you just created.

2. Configure the page setup to match your paper and label size
- In the File menu, select Page setup.

- Choose custom layout, and enter the width and height of each individual label.

- Enter the margins of each label in relation to one another.

- Check Repeat the layout on page.

- Choose custom page and enter the width and height of the paper.

- Confirm the unit of measure and switch if necessary. Select Apply.

- You'll see the label outline applied to your template.
3. Add data fields to the label
- Select the text icon from the left hand side bar and then select Insert Data Field.

- Choose the data field and select Insert Data Field.

Heads up
If a data field isn't in the list, the sample SKU doesn't have a value entered for that field. Exit the editor and update any product with that field you wish to use. The editor references the most recently edited product, so when you return to the editor all data fields on the most recently edited product will be available for selection.
- Reposition the text box with the arrow cursor or use the position boxes under properties. Resize the text box by clicking on it and dragging the corners in or out, or use the dimensions boxes under properties.

- Use the cut text or reduce font size checkboxes to prevent field content from overlapping other label elements.

- Use the formatting tab to add padding to the text box, select the content type, set up columns or update the raw value of the data field.

- Change the font, size, and text elements with the tools in the top toolbar. Select the text box before making changes.

- Repeat steps 1 to 6 to add additional data fields until your label is complete.

4. Preview and save your label
- In the File menu, select Preview to generate a preview of your template. The preview will reference the 15 most recently modified items in your store.

- In the File menu, select Save to save the label.
More Information
For more information on printing a shelf label, see the article How to print labels made in visual template editor.
Comments
Please sign in to leave a comment.