

How To
What is a child product and how do I use it?
Follow these steps
A child product is a variation of a product that stems from a parent product. Most often, the variation is in the number of units sold as one unit. The parent product is the original form of the product, and the child product is the subsequent product of the parent product with the variation.
A child product is best explained with a real-life example. Your customer walks into your store looking to purchase a single can of beer. Your singles cooler is stocked, but not with the specific brand the customer is looking for. You break down a 6-pack and sell them a single can, then add the remaining units to your singles cooler.
In GlobalTill, the single can of a beer is the child product and the full 6-pack is the parent product.
When scanned at the POS, products with a child product offer the option of selling the child product instead of the parent product.
To use child products in your store, follow these steps.
Create the child product
Before you can assign a child product to a parent product, you must create a SKU for the child product first. To create the child product, follow these steps.
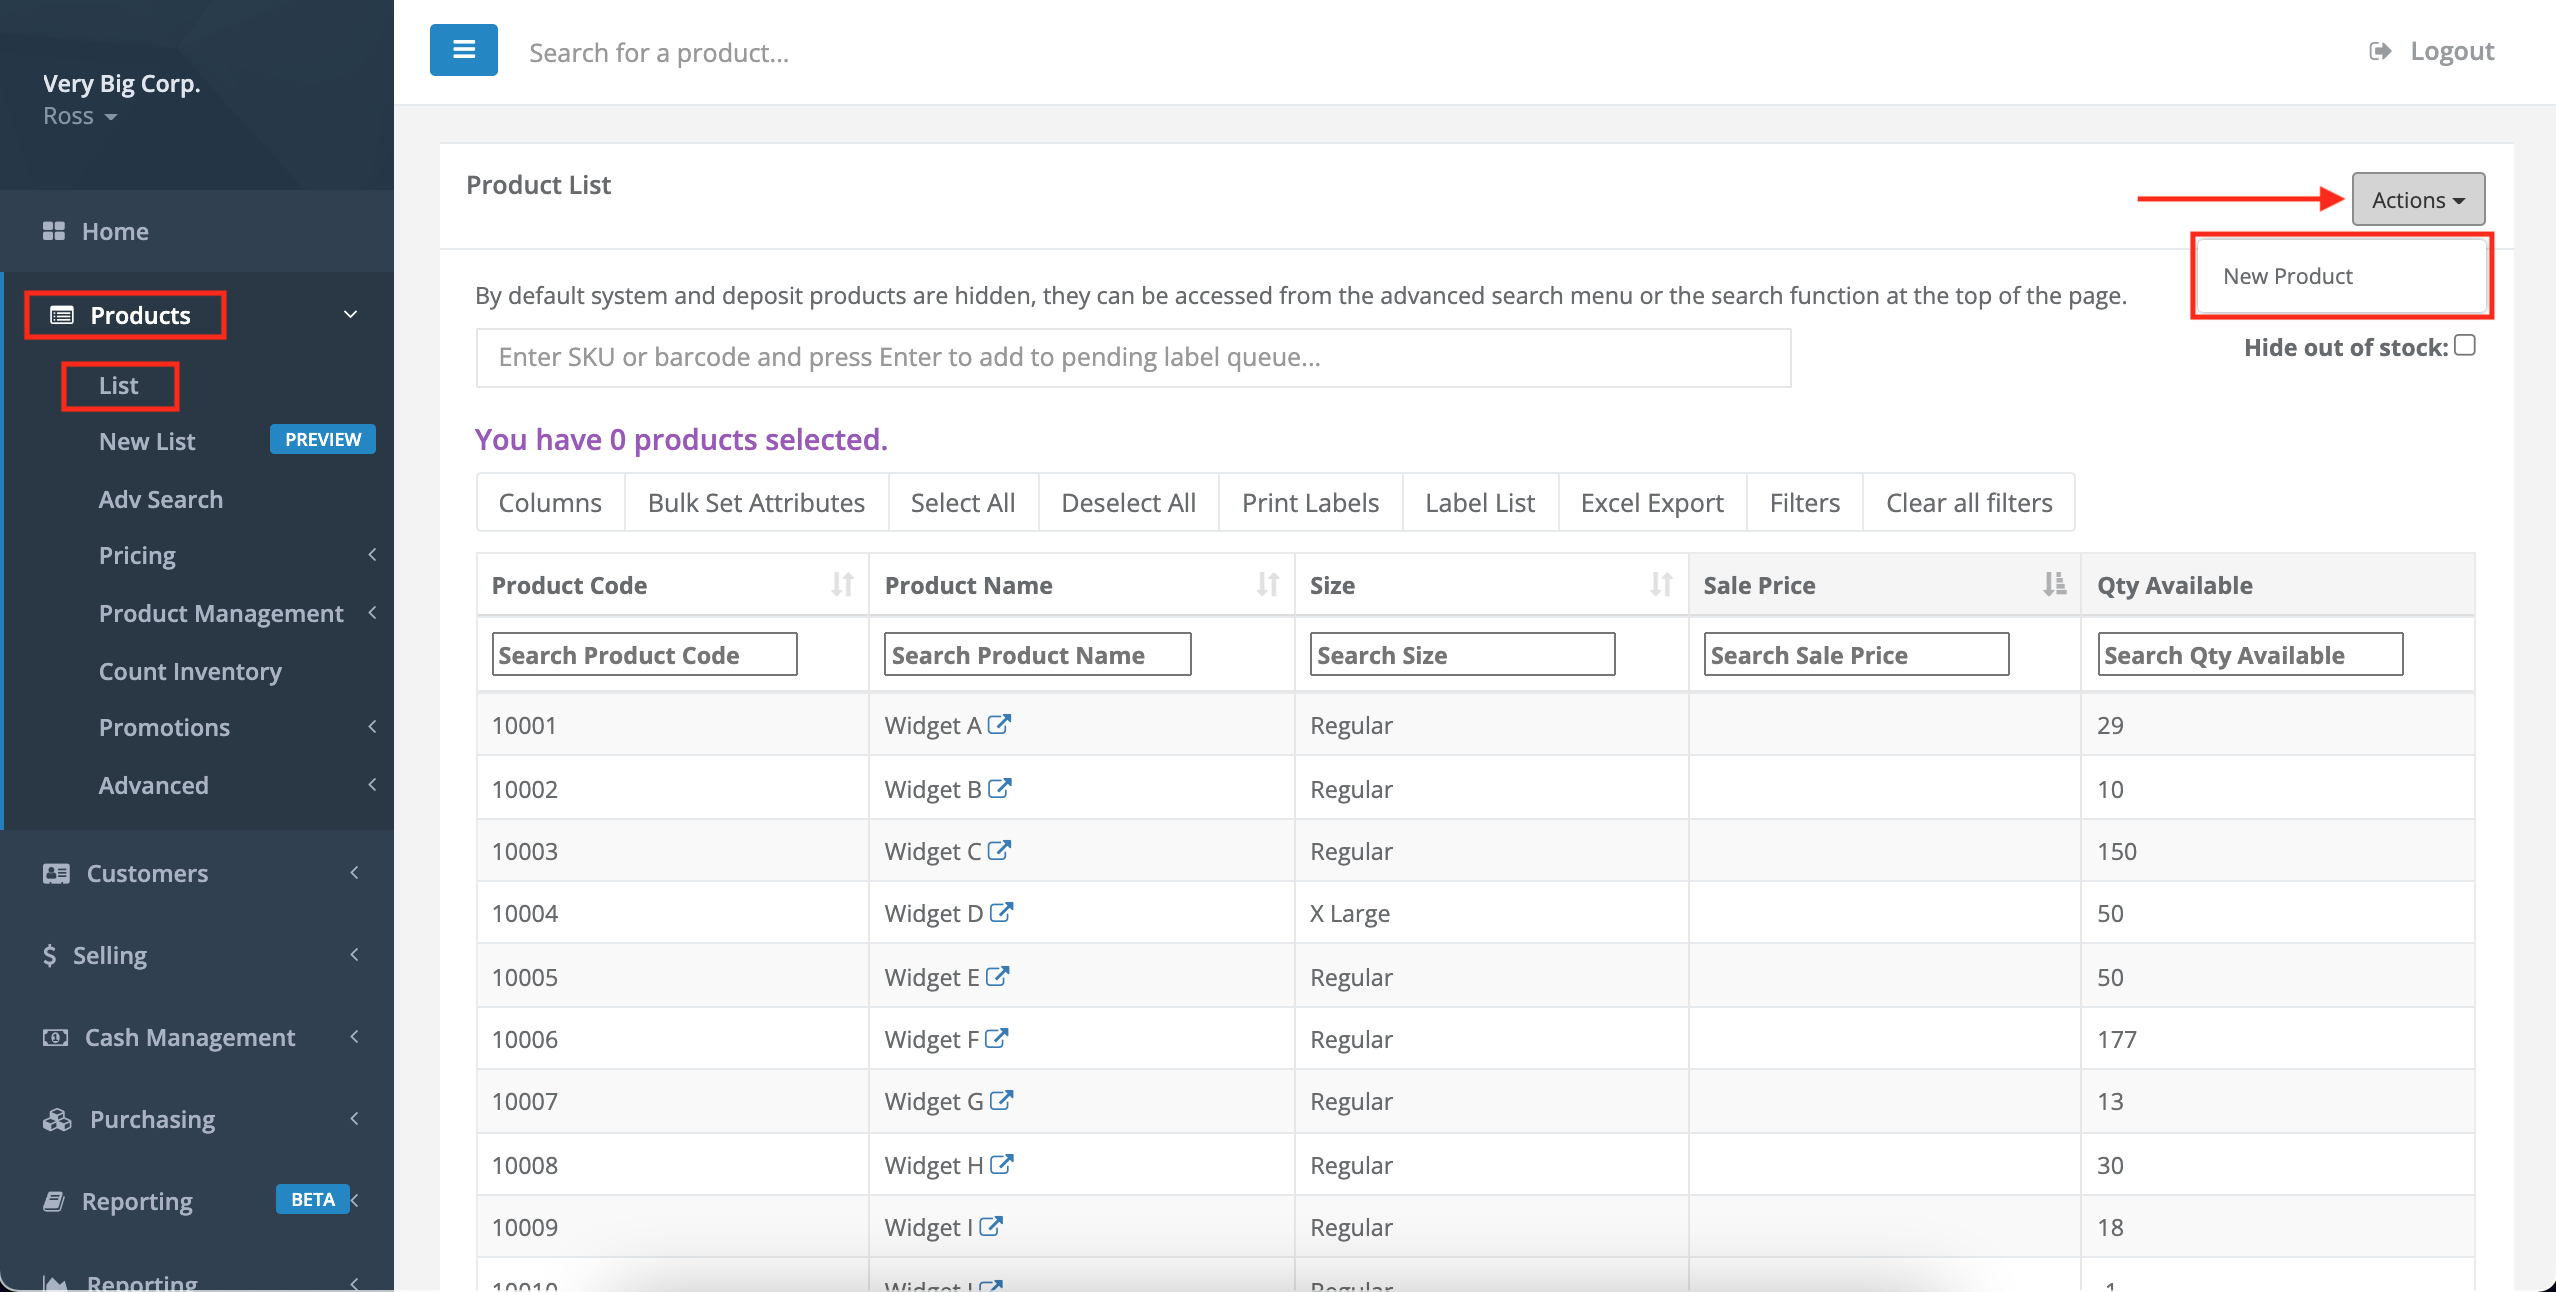
- Select Products > List, then select Actions > New Product.
- In this example, for the Product Code we'll copy the SKU from the parent product and append an "/s" to signify it's a single. You can use whichever naming convention makes sense for your store.
- Add a Product Name to distinguish it from the parent, and add a Size, Category, and container Deposit for the child product.

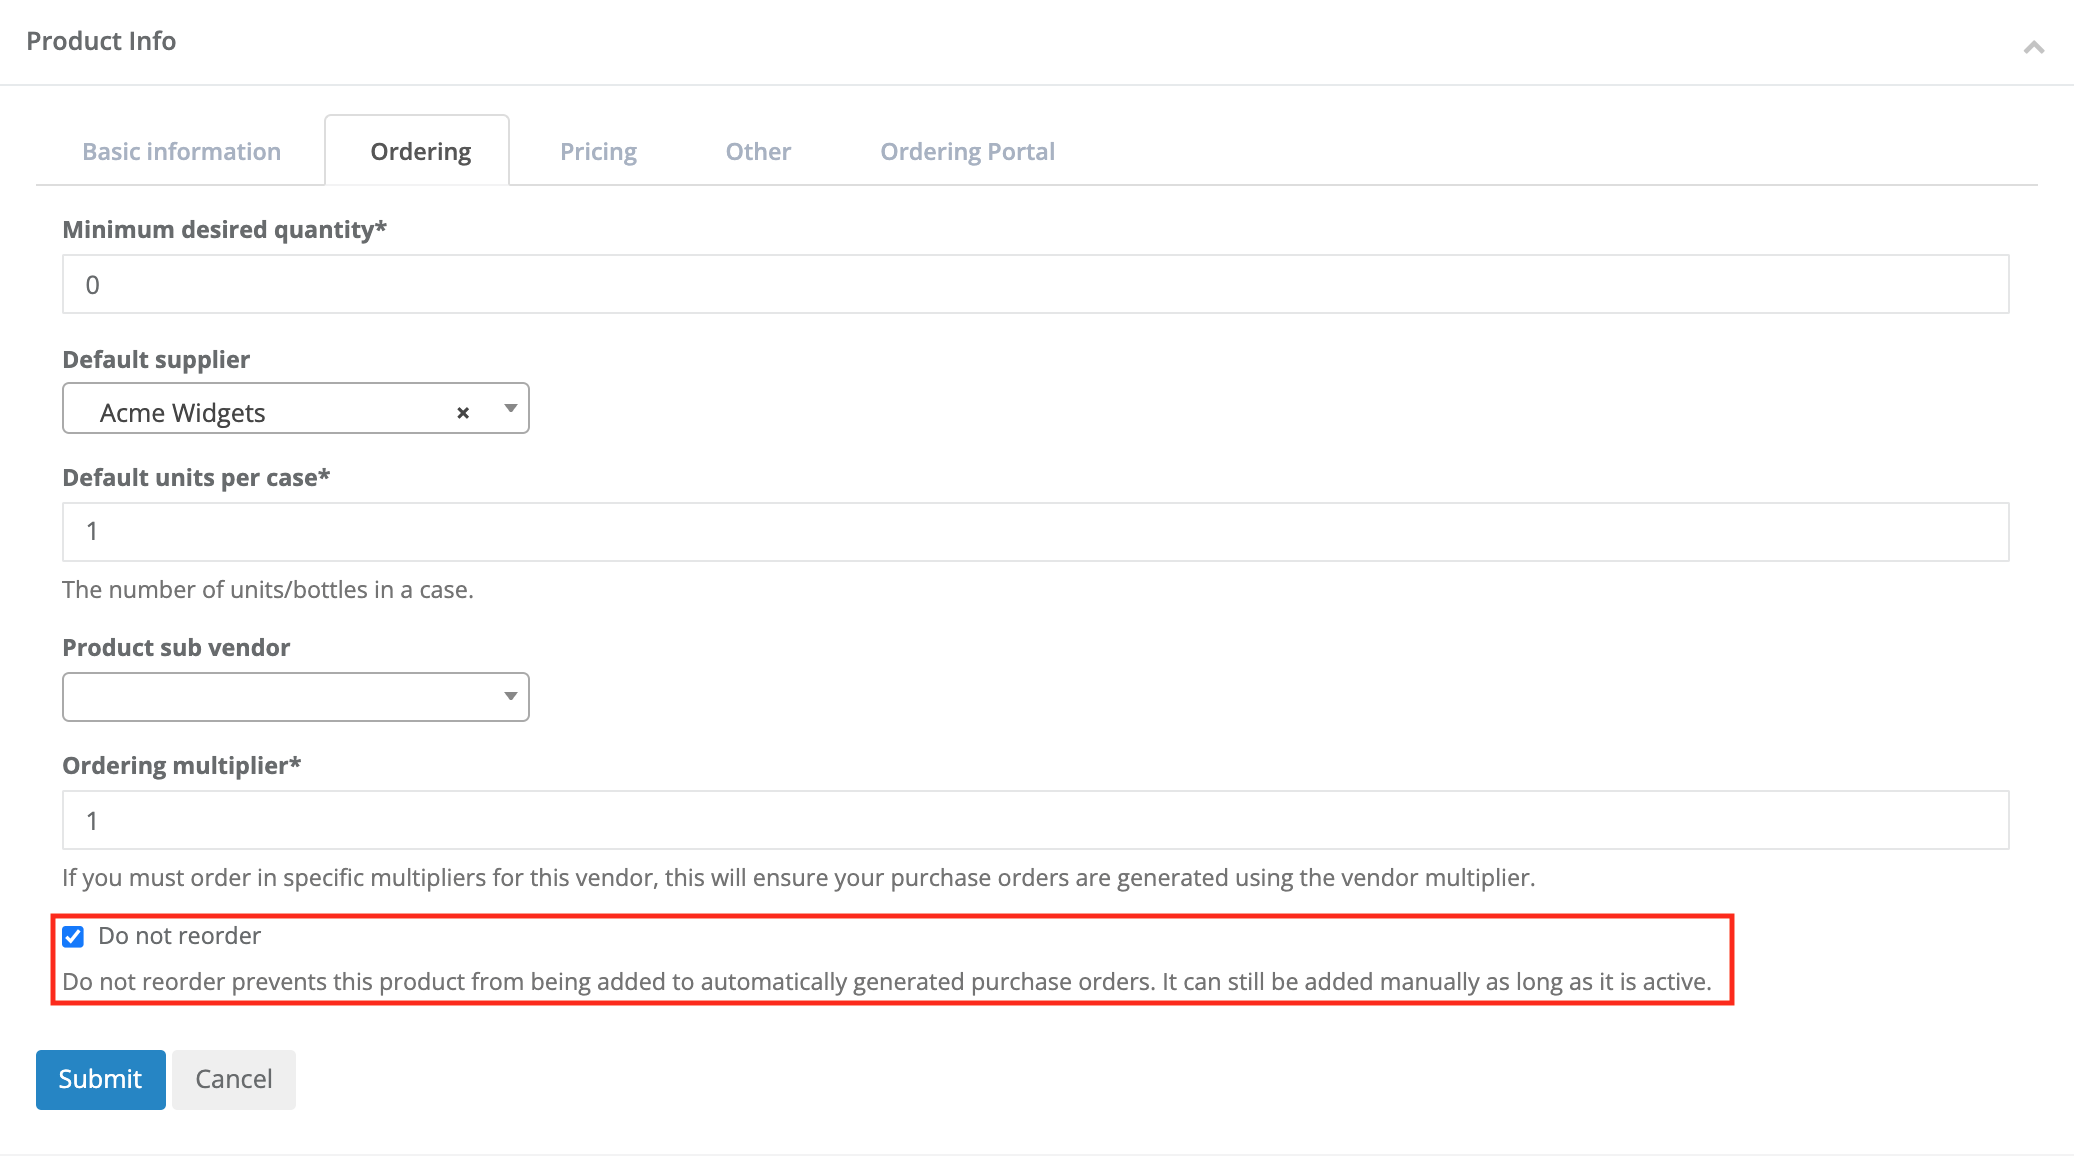
- From the Ordering tab, add the Supplier and ensure you check Do not reorder. This is to keep sales activity out of the automated ordering calculations, as this is already captured by the parent product.
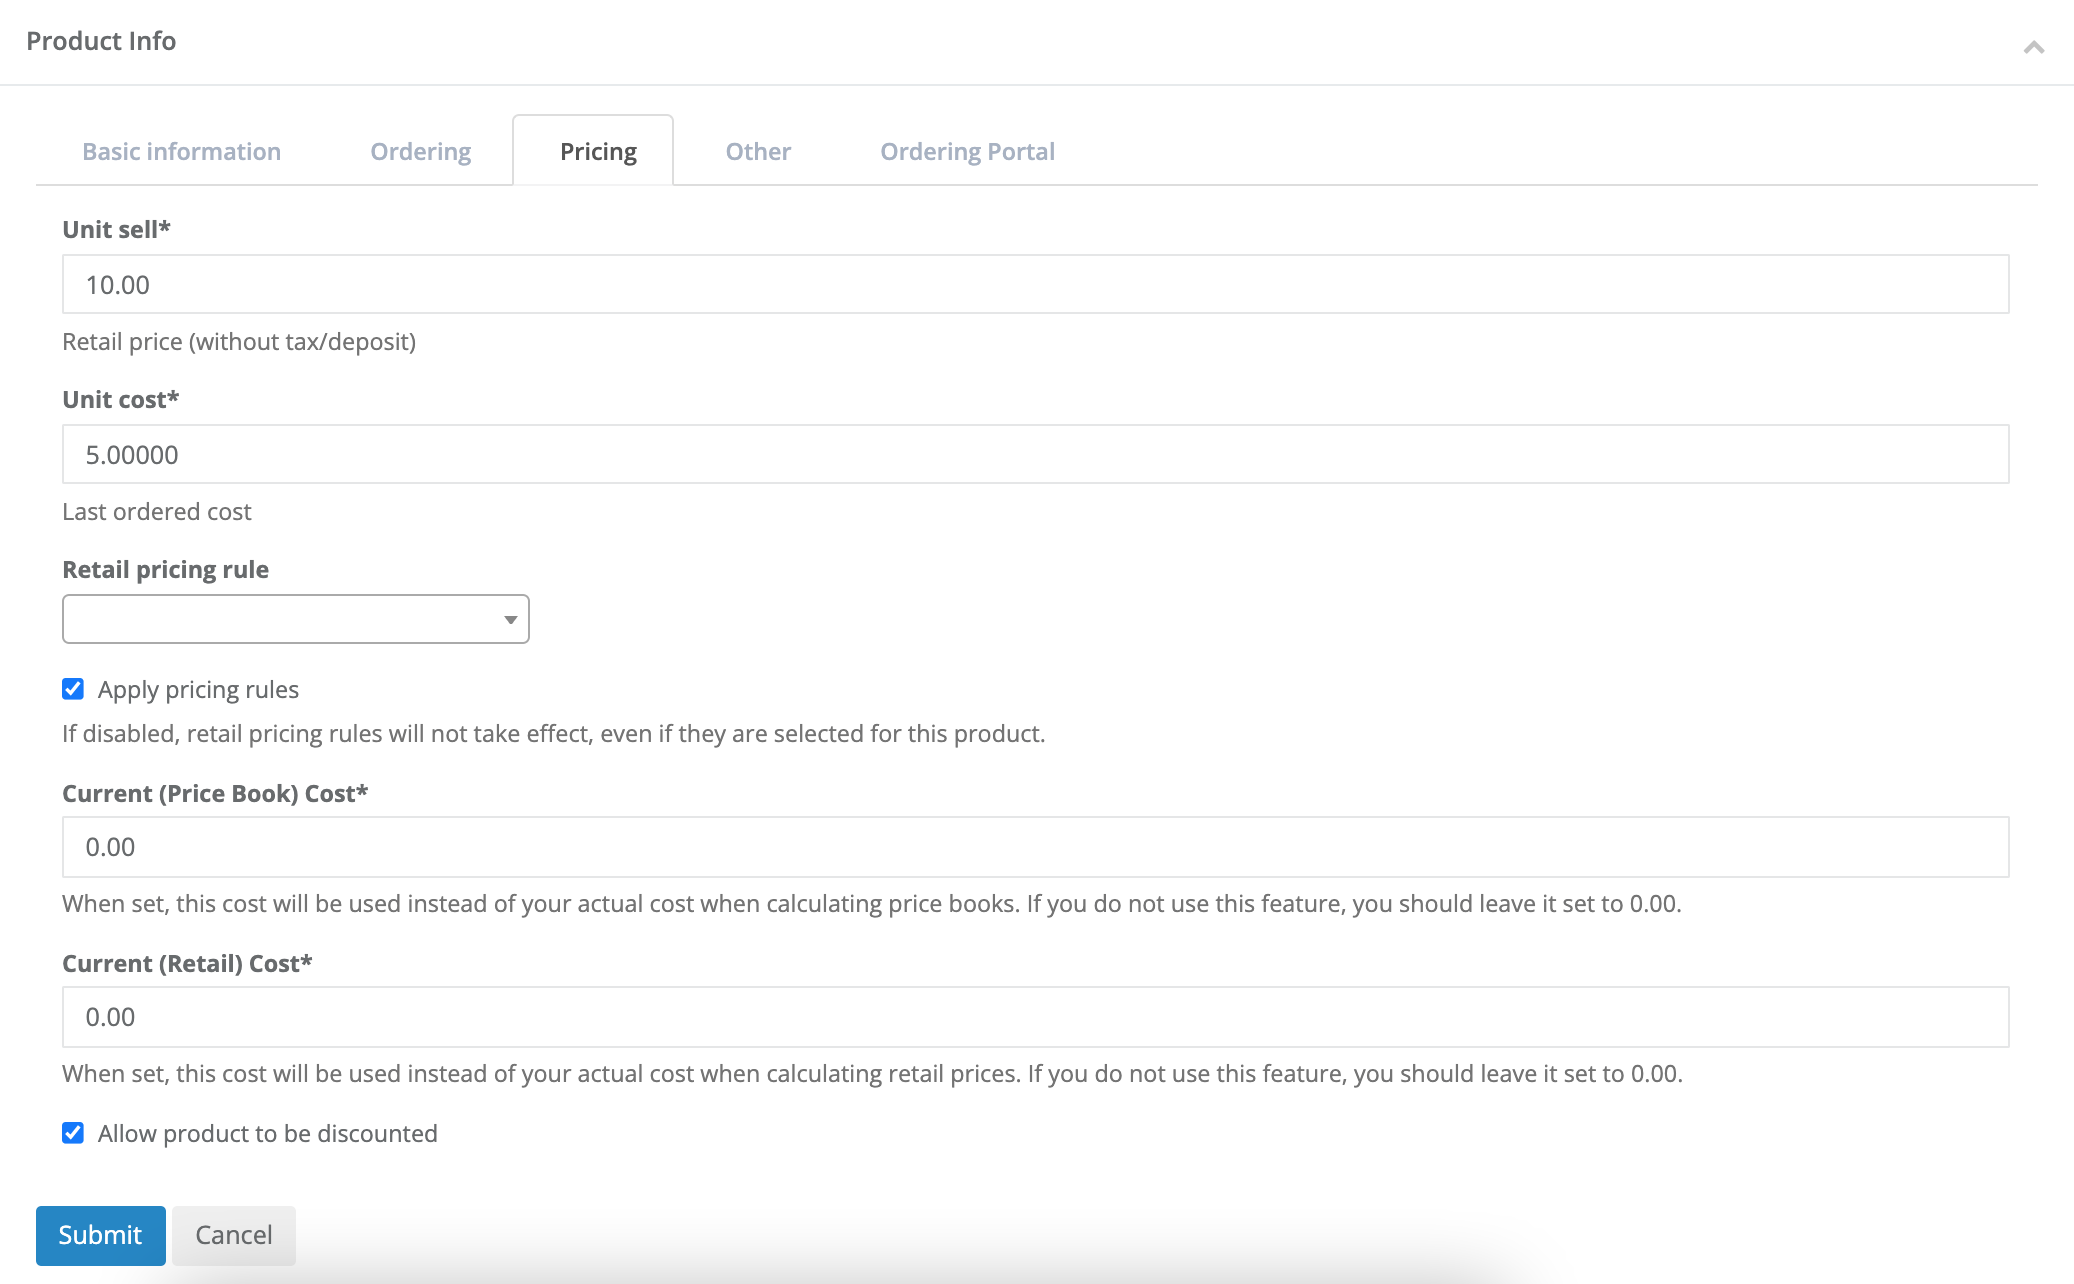
- From the Pricing tab, add the Unit sell and Unit cost for a single unit, then select Submit.
Attach the child product to the parent product
Now we'll attach the child product to the parent product so when the parent is scanned, the button to update the parent product to the child product is enabled. To attach the child product to the parent product, follow these steps.
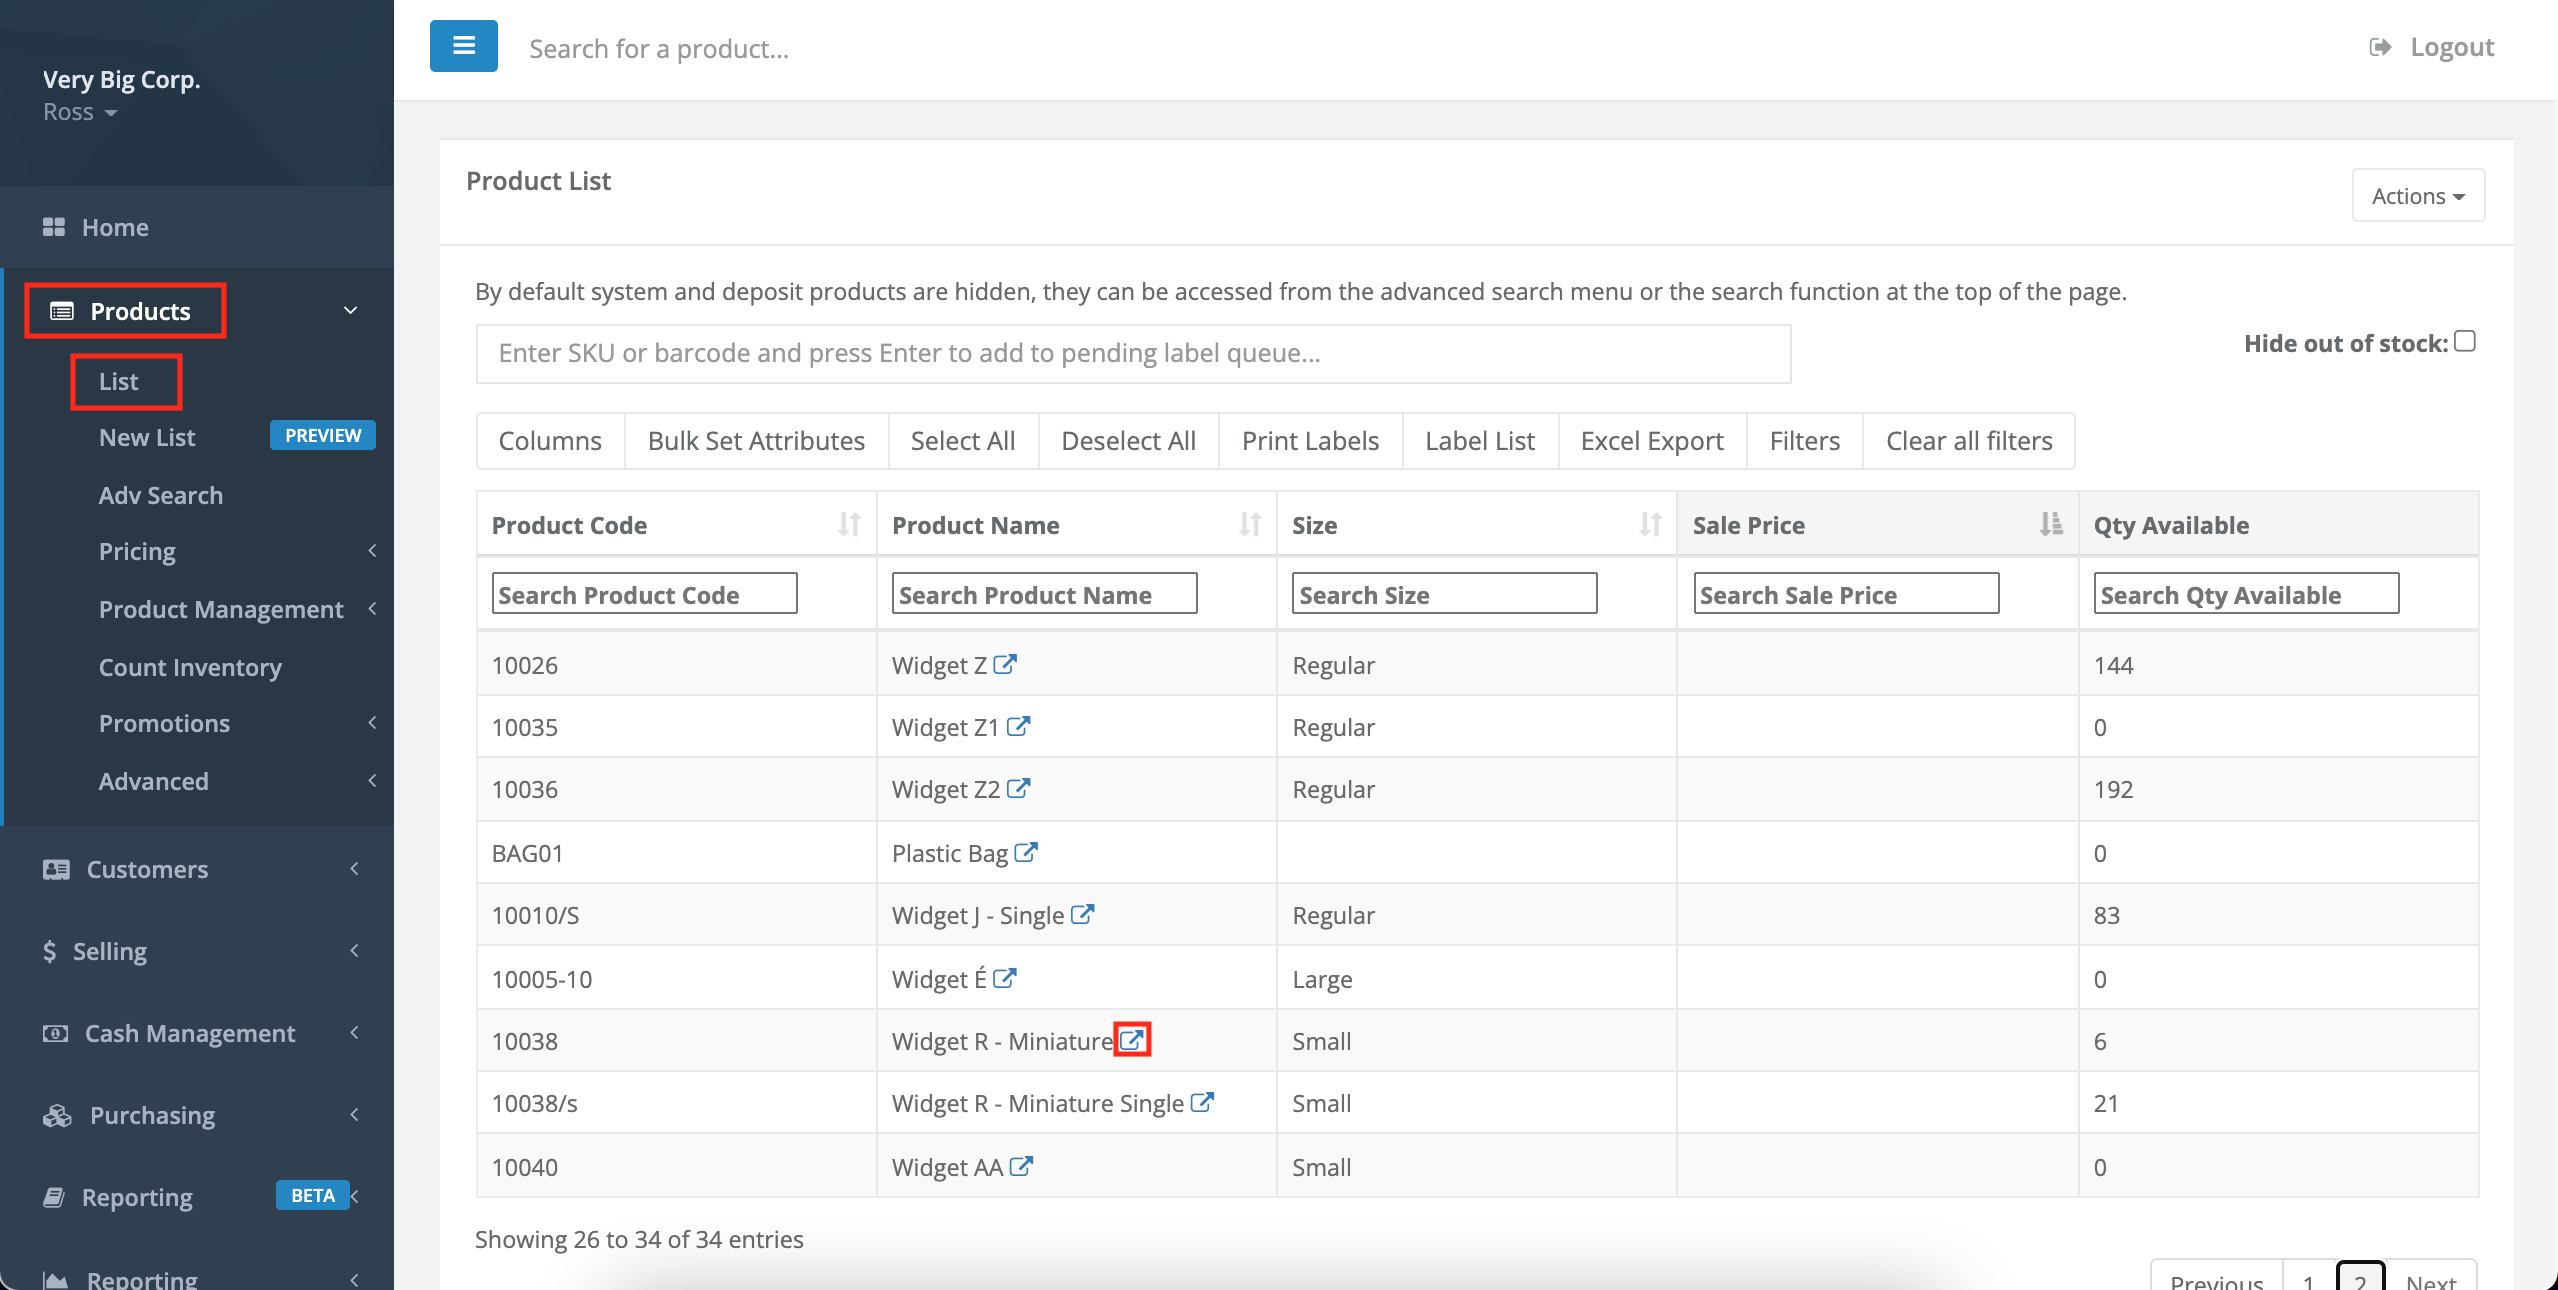
- Select Products > List.
- Locate the parent product and open it.
- Select Actions > Edit Product.

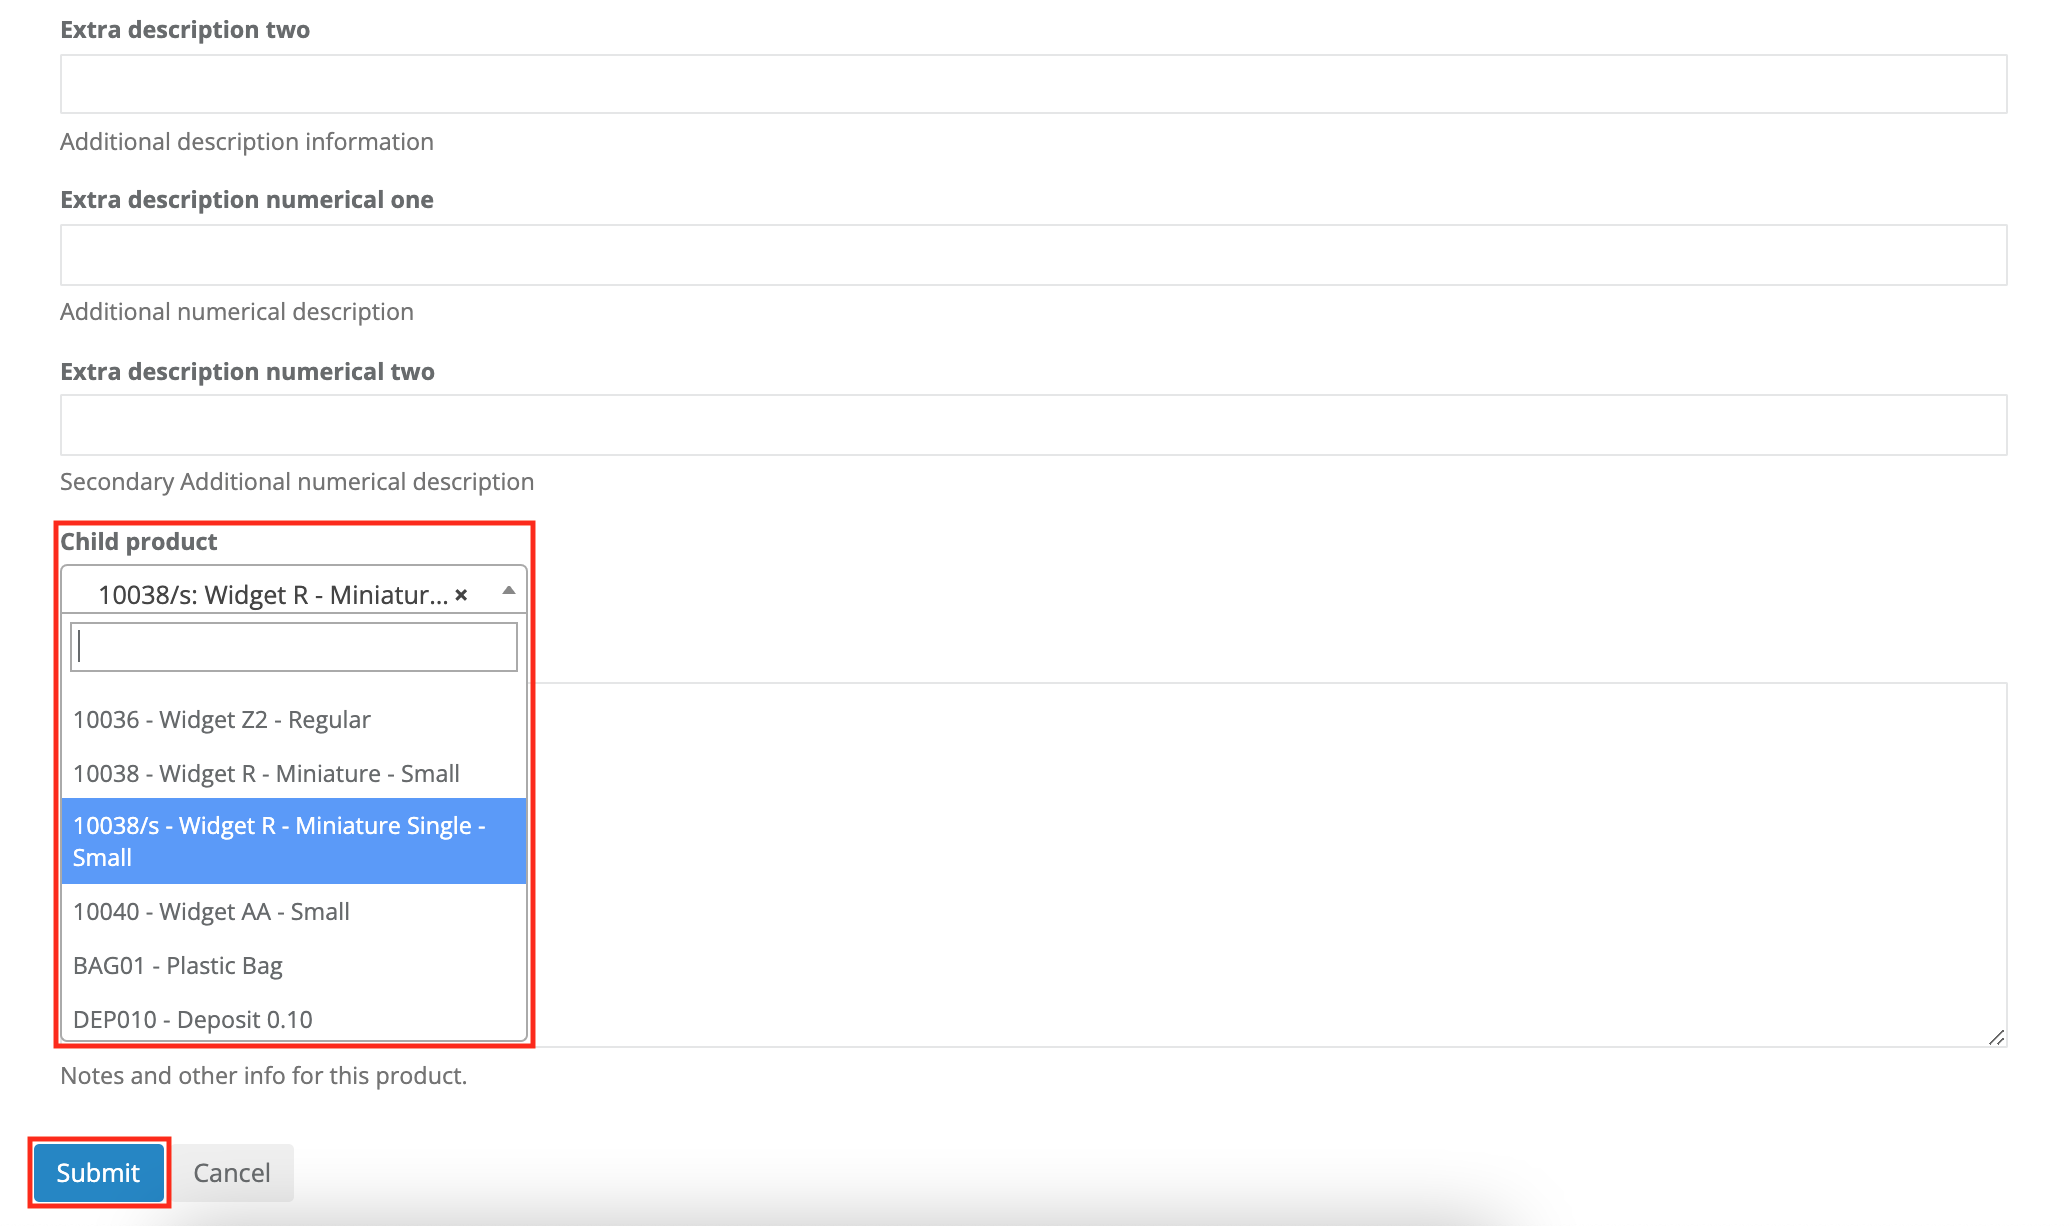
- Select the Other tab.
-
Select the Child product from the drop down list, then select Submit.
The resulting scan at the POS
Now when the parent product is scanned at the POS, the single button appears.
- The parent product shows up like it usually does, but with the additional button.
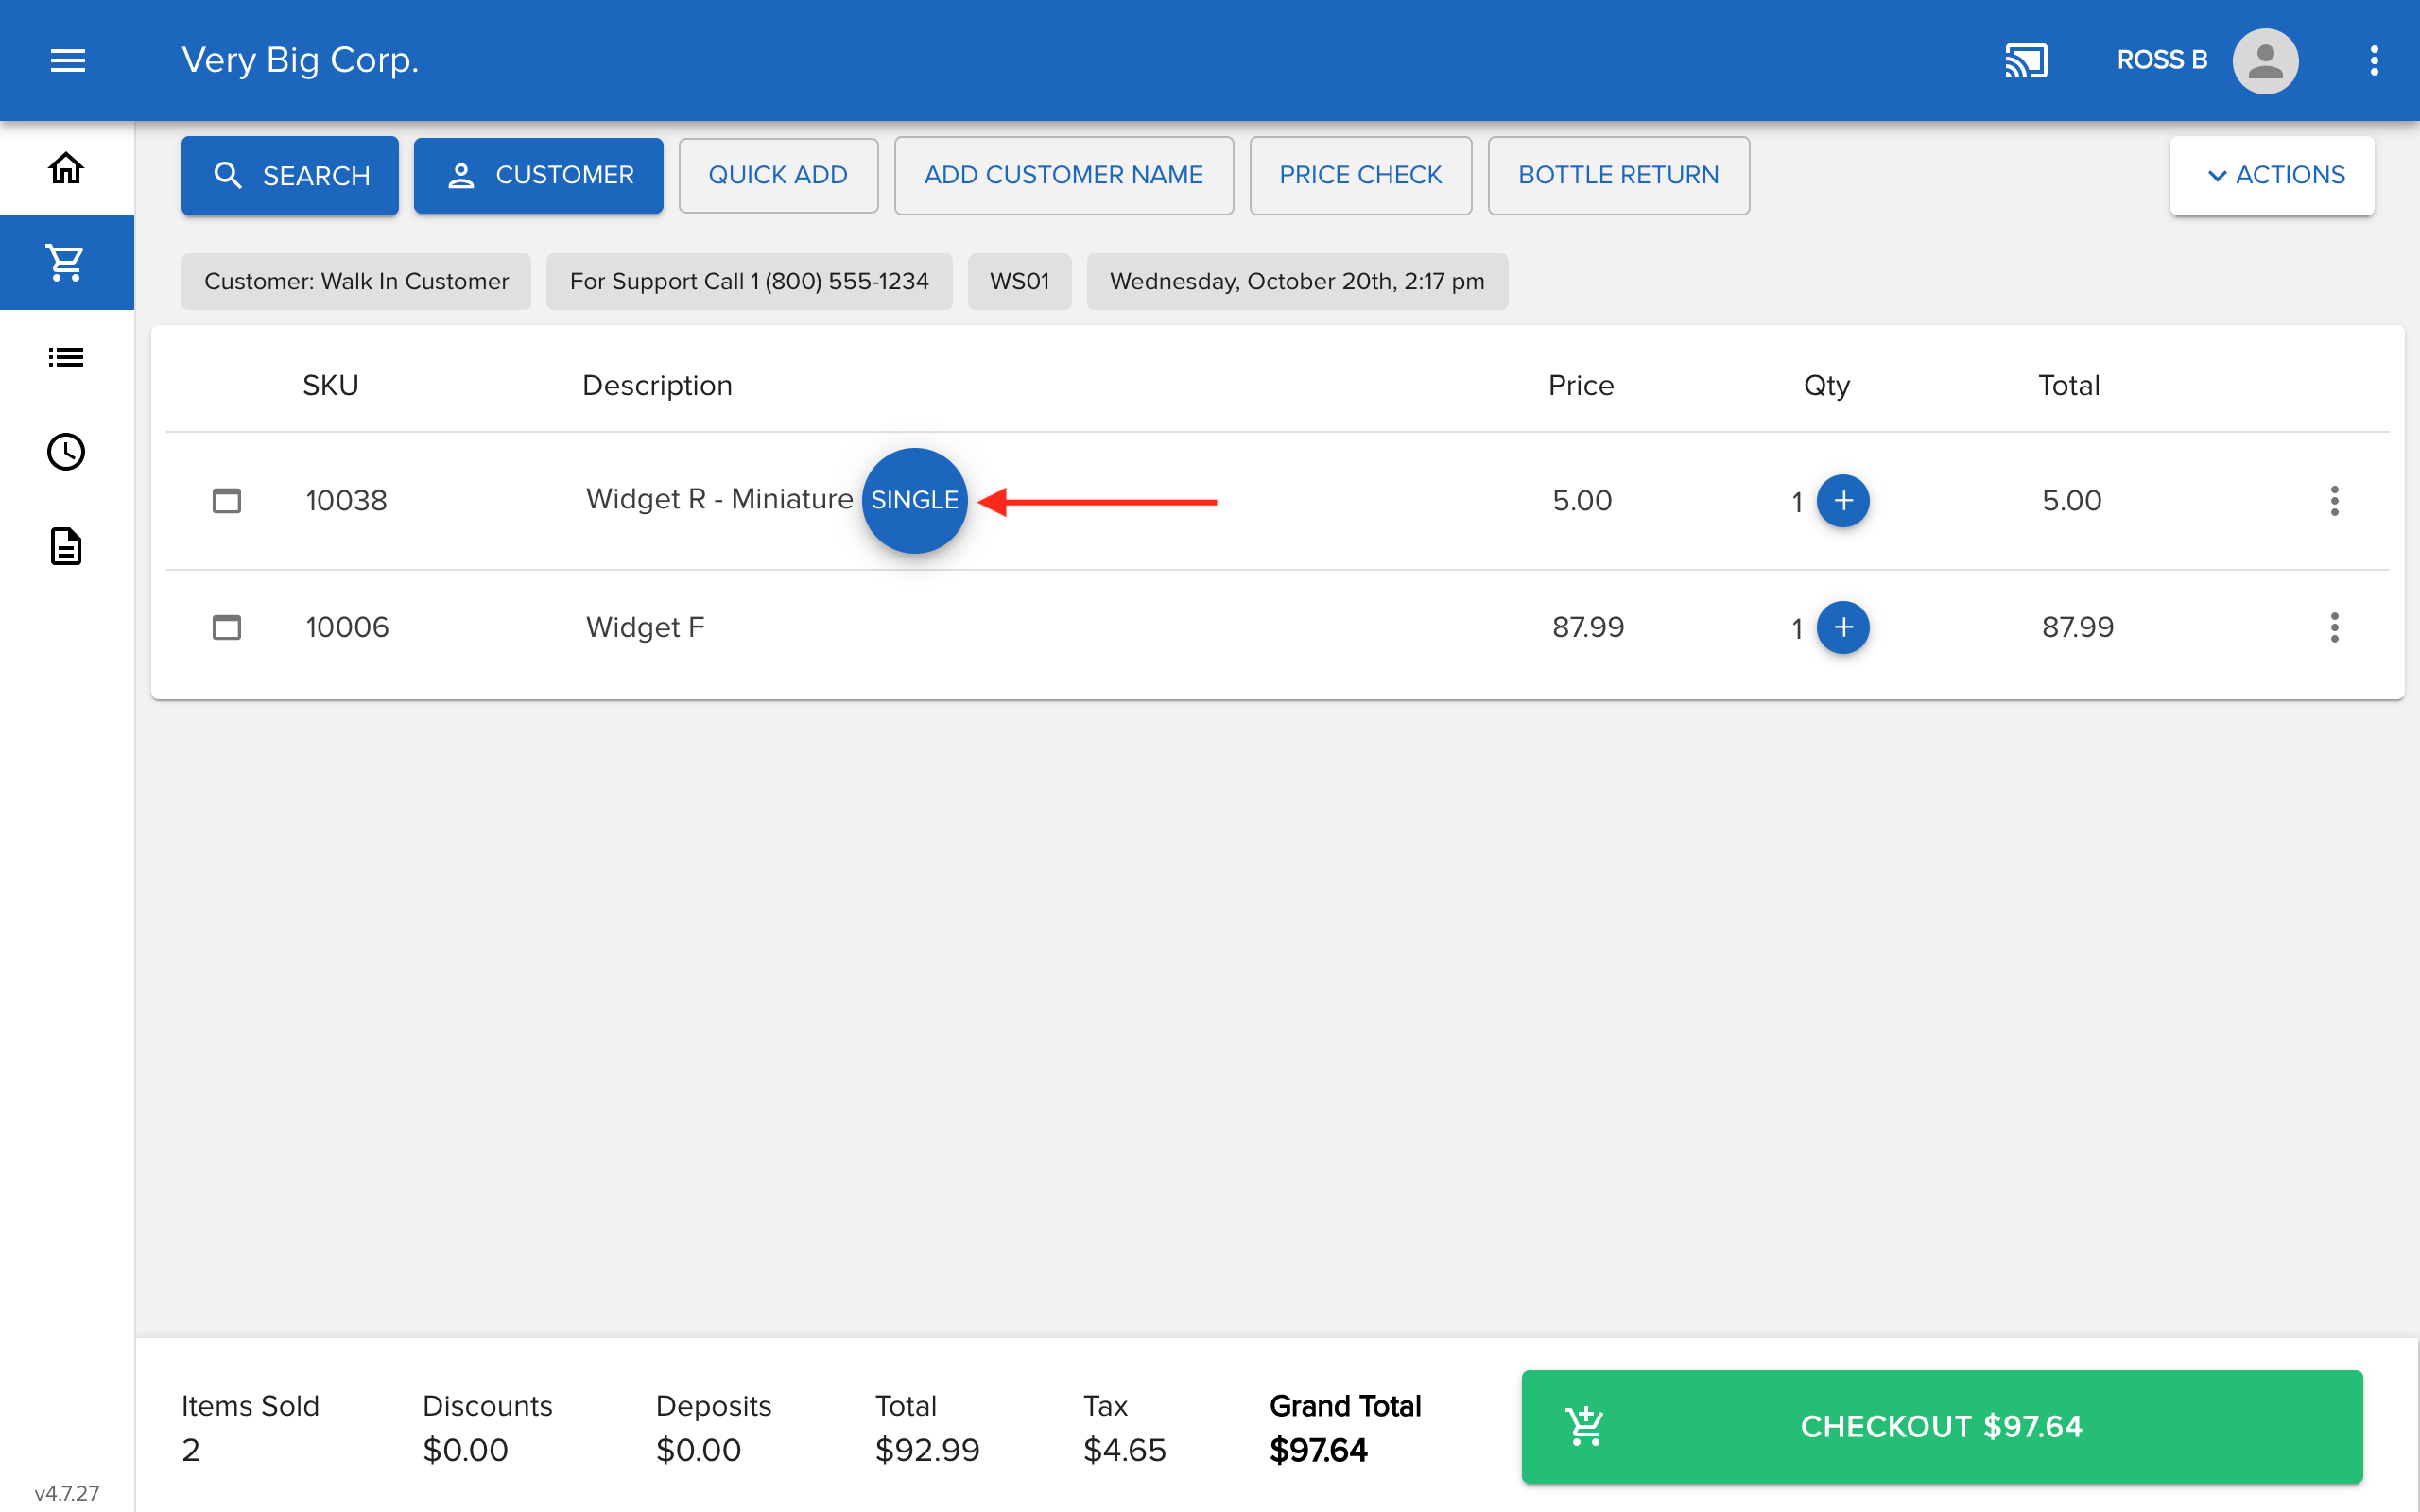
- Selecting the Single button updates the parent product to the child product.

More Information
For more information about child products, see the article How to manage child product inventory.
Comments
I really want to be able to look at the more information article of How to manage child product inventory, but it says "You're not authorized to access this page" when I click on the link. How do I become authorized?
Hi Shannon,
Thanks for reaching out. We had the article set to be available to our team internally until we finished the review process.
We've updated the access so you can now view it.
Thank you!
Please sign in to leave a comment.