

How To
How do I set up a customer for the customer ordering portal?
Follow these steps
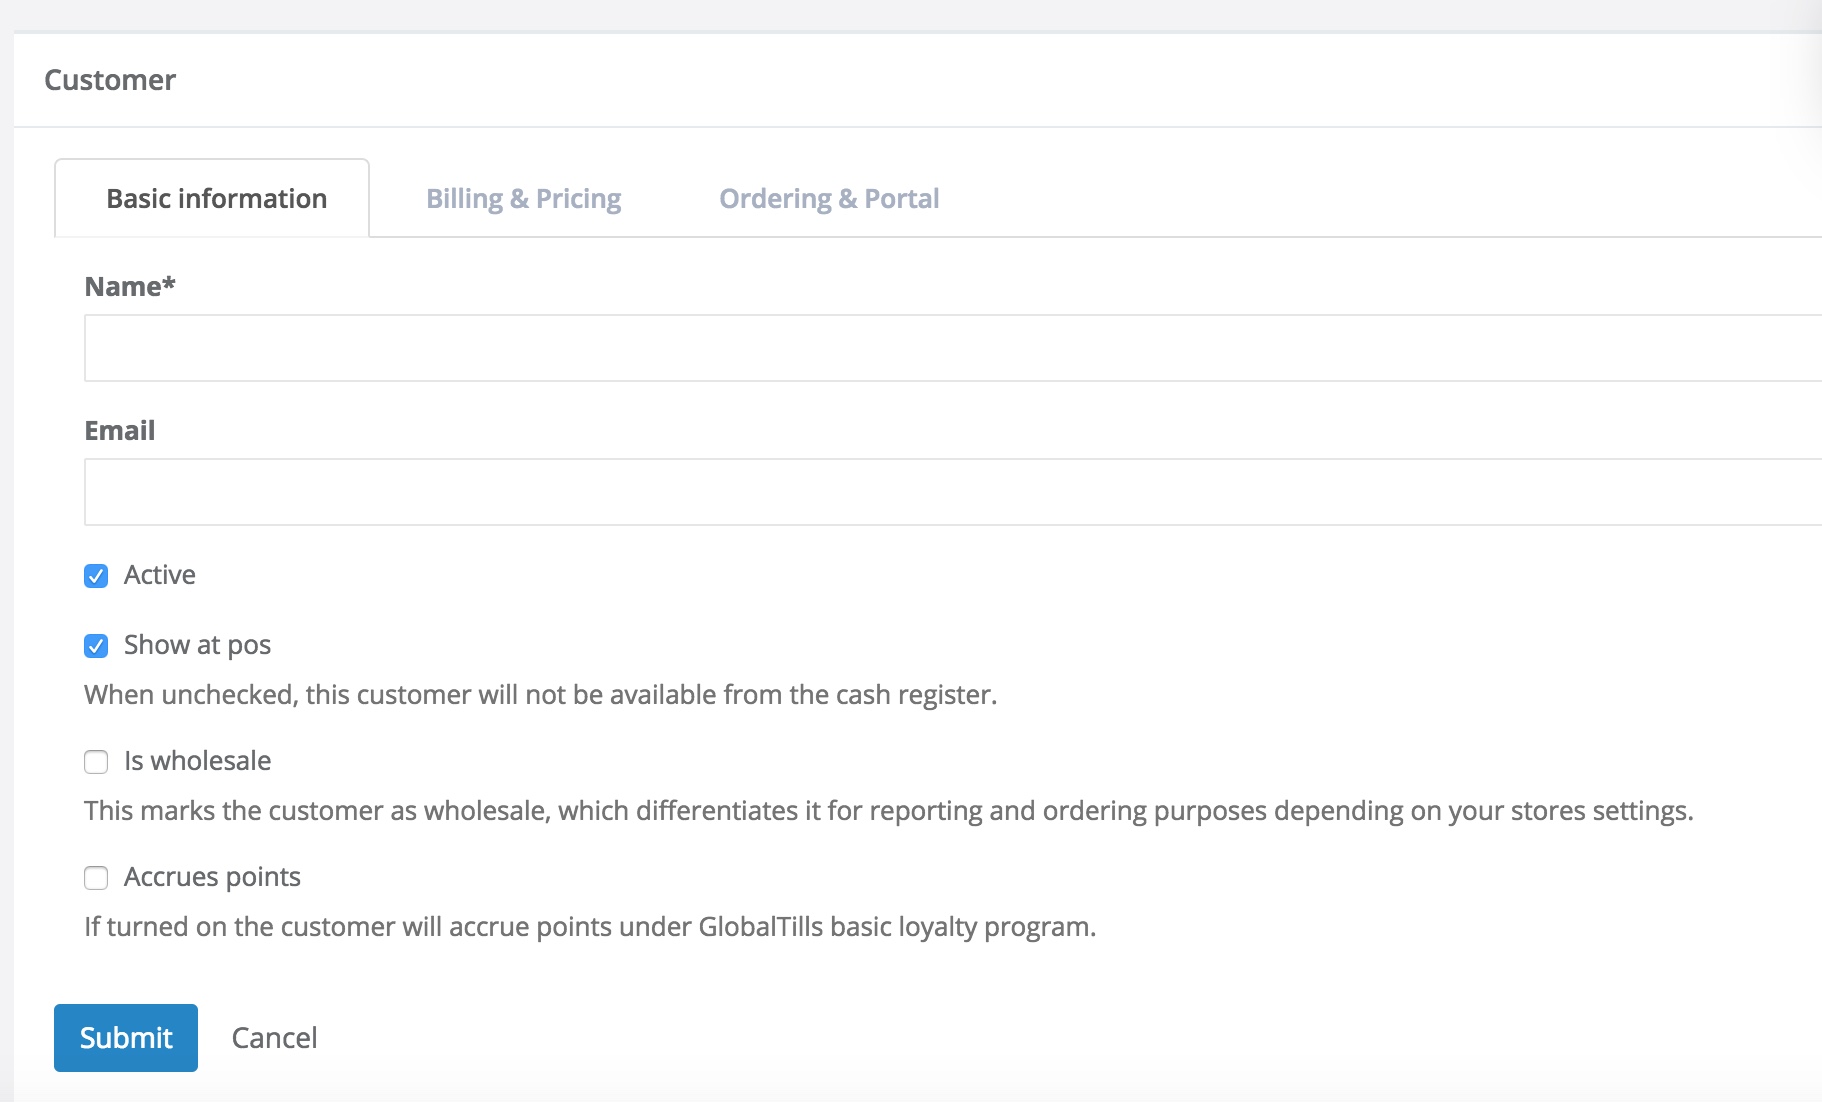
Step 1: Create the customer in the GT Backend if it doesn't already exist
- Select Customer > List.
- Select the Wrench icon and select Add Customer.
- Enter the Basic Information including Name (required) and Email.
- Select Active to make the customer active in GlobalTill. (Inactive customers are typically hidden from customer lists, reports, etc., but are not deleted. )
- Select Show at POS if you want this customer to appear at the POS. (Note: Customers with a credit limit greater than 0 will have the option to charge the purchase to their account.)
- Select Is Wholesale, which will differentiate the customer in reporting and ordering, depending on your store settings for your wholesale customers.
- Select Accrues Points if the customer will accrue points under GlobalTill's Loyalty Program (although for most wholesale customers, this box should remain unchecked).
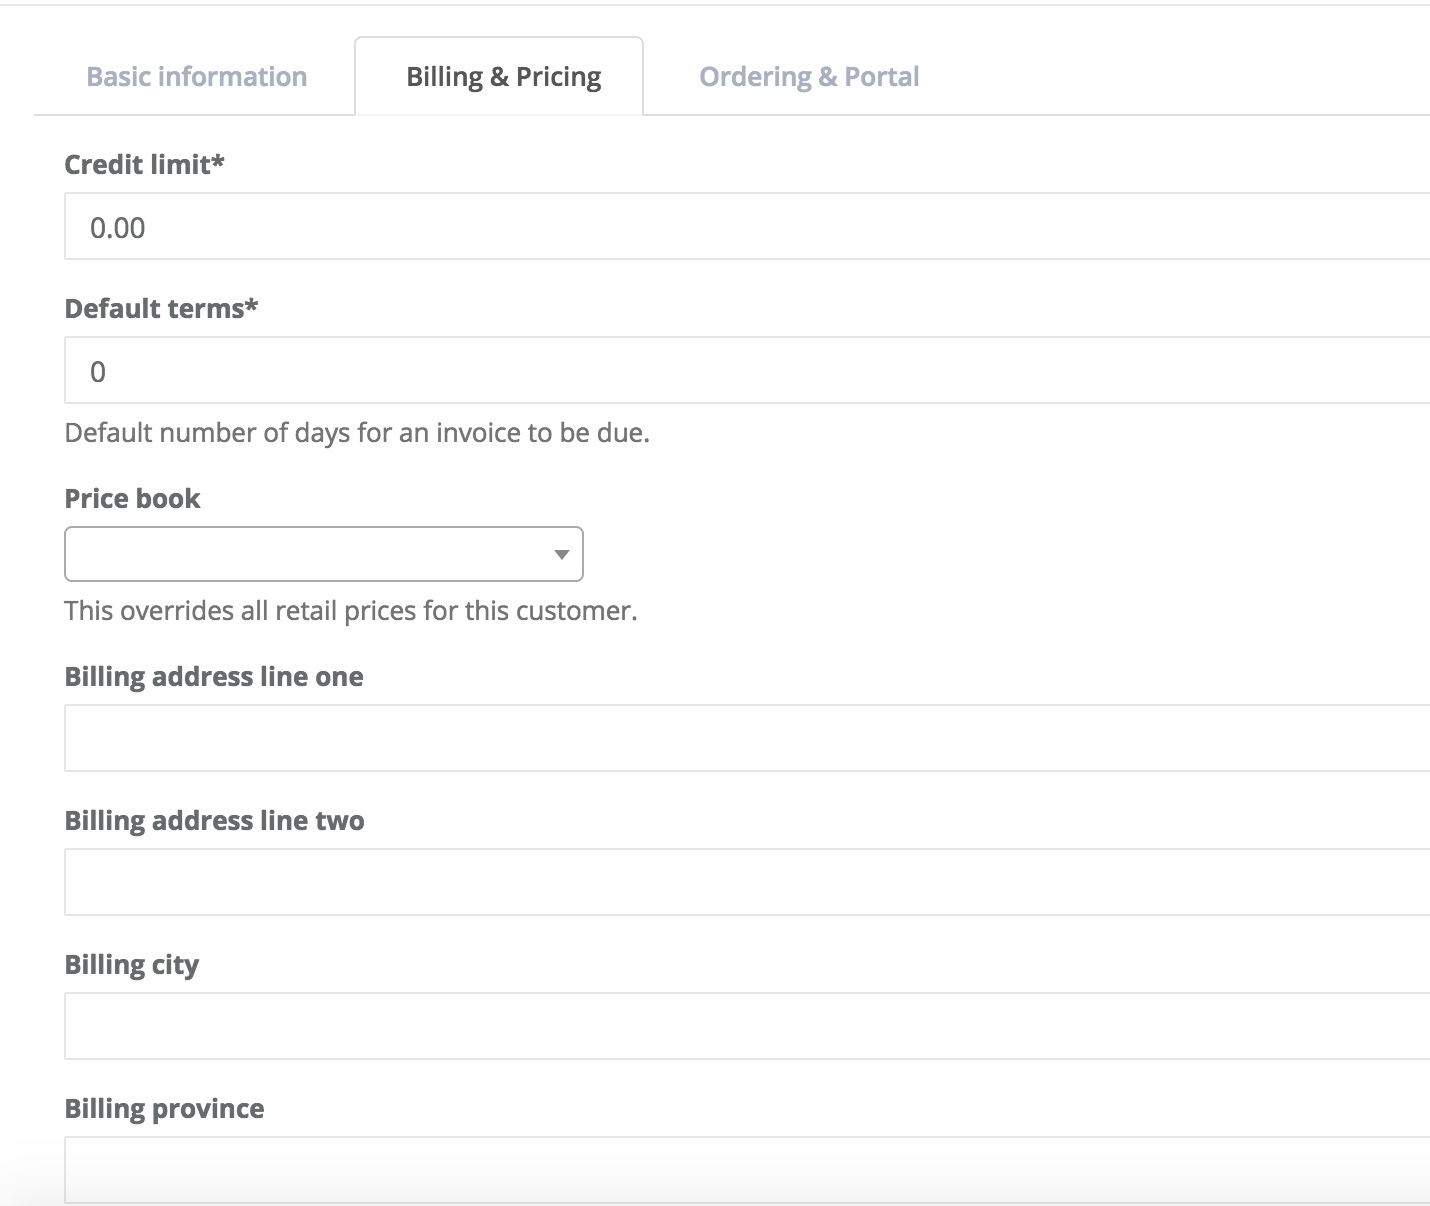
- Choose Billing & Pricing Tab.
- If you offer the customer credit, fill out the Credit Limit and Default Terms (the number of days for an invoice to become due).
- Choose what Price Book to attach to the customer. If a Price Book is not specified, regular retail pricing will be used.
- Enter Billing Address or Shipping Address if necessary.
- Select the Ordering and Portal tab.
- (optional) Enter the Order Day, or the day of week customer is expected to place their order.
- (optional) Enter the Order Cutoff time. This must be formatted in the 24-hour clock, also called military time, so 1:00 pm is 13:00).
- Enter the Default Shipping Charge if any (required). If there is none, set to 0.00.
16. Enter any Default Shipping Instructions, which will appear on all orders placed. This information will be displayed when an order is getting converted to an invoice.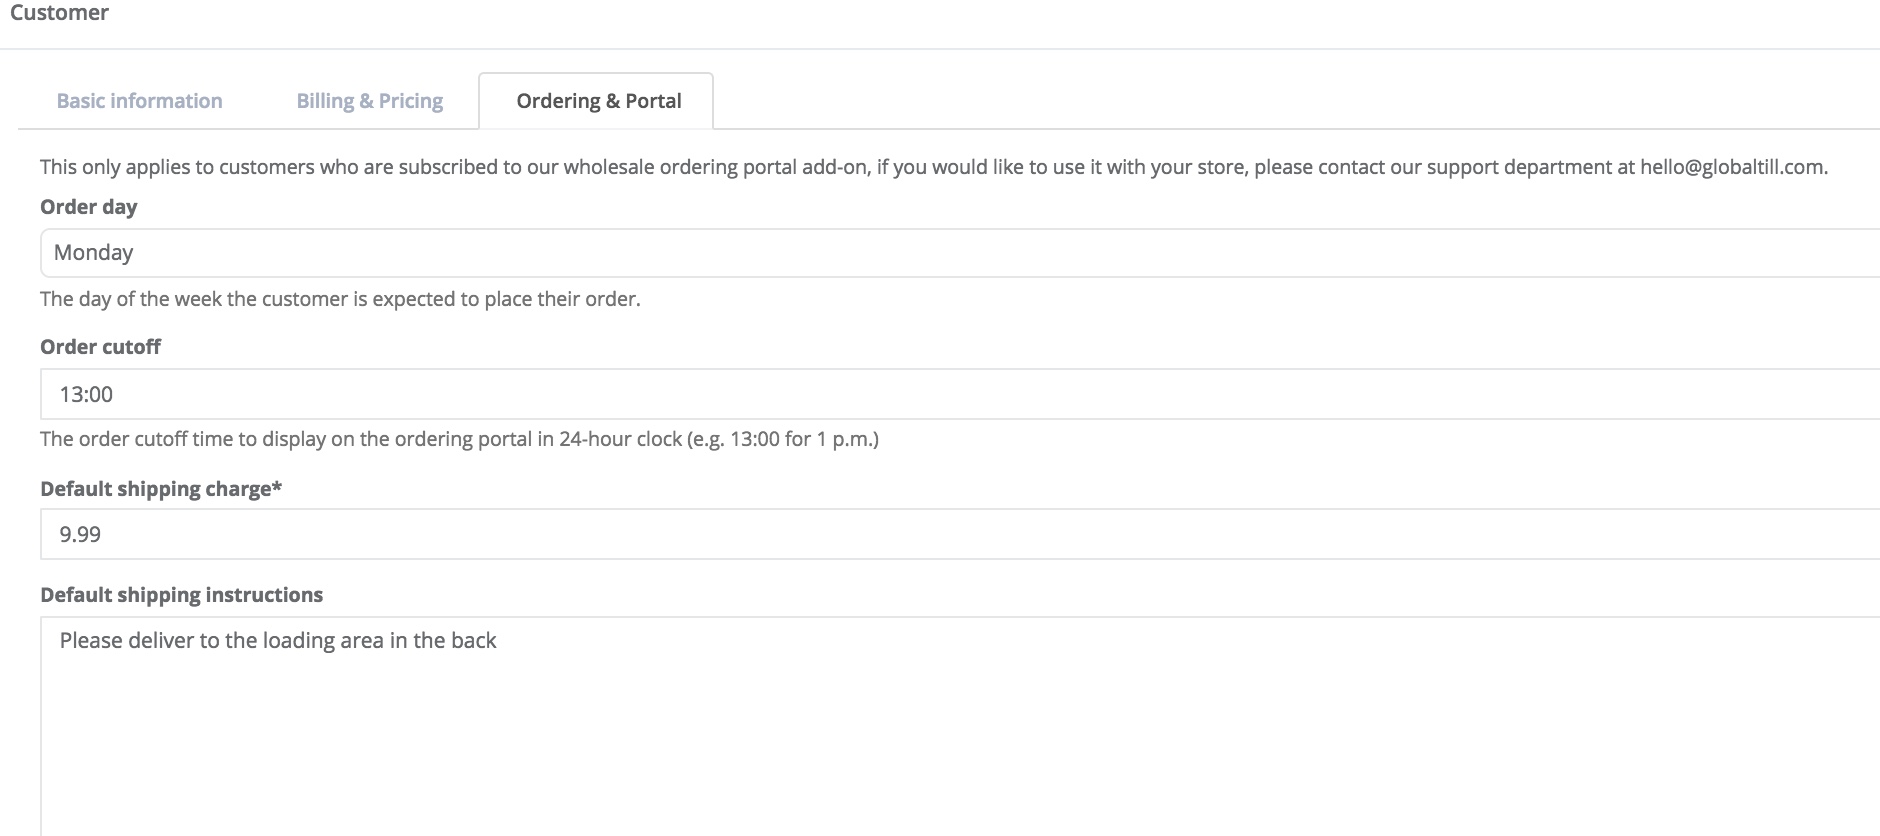
- Select Submit.
Step 2: Give a Customer Access to the Online Ordering Portal.
- Select the customer from Customers > List.
- Select the Account Contacts tab.
- Select Add Contact.
- Choose what the Contact Type is. Types include Ordering Contact, Billing Contact, Administration (Owner/Manager), Main Line (Restaurant/Bar)
- Select Submit
- Return to the Account Contacts tab and Send Invite to the portal user. The customer will be emailed an invitation with a link to join the portal. They will create a username or password to access the ordering portal.
More Information
For more information, see the article How customers place orders through your ordering portal.
Comments
Please sign in to leave a comment.