

How To
How do I import sales to QuickBooks Online?
Follow these steps
Step 1: Export the Quickbooks Sales Export.
Heads up
If you're not sure which variation to choose, consult with your accountant or bookkeeper on the best import to use for your business.
- Go to Reporting > Report List.
- Select Special > QuickBooks Sales Export.

- Enter the Date Range into the form.
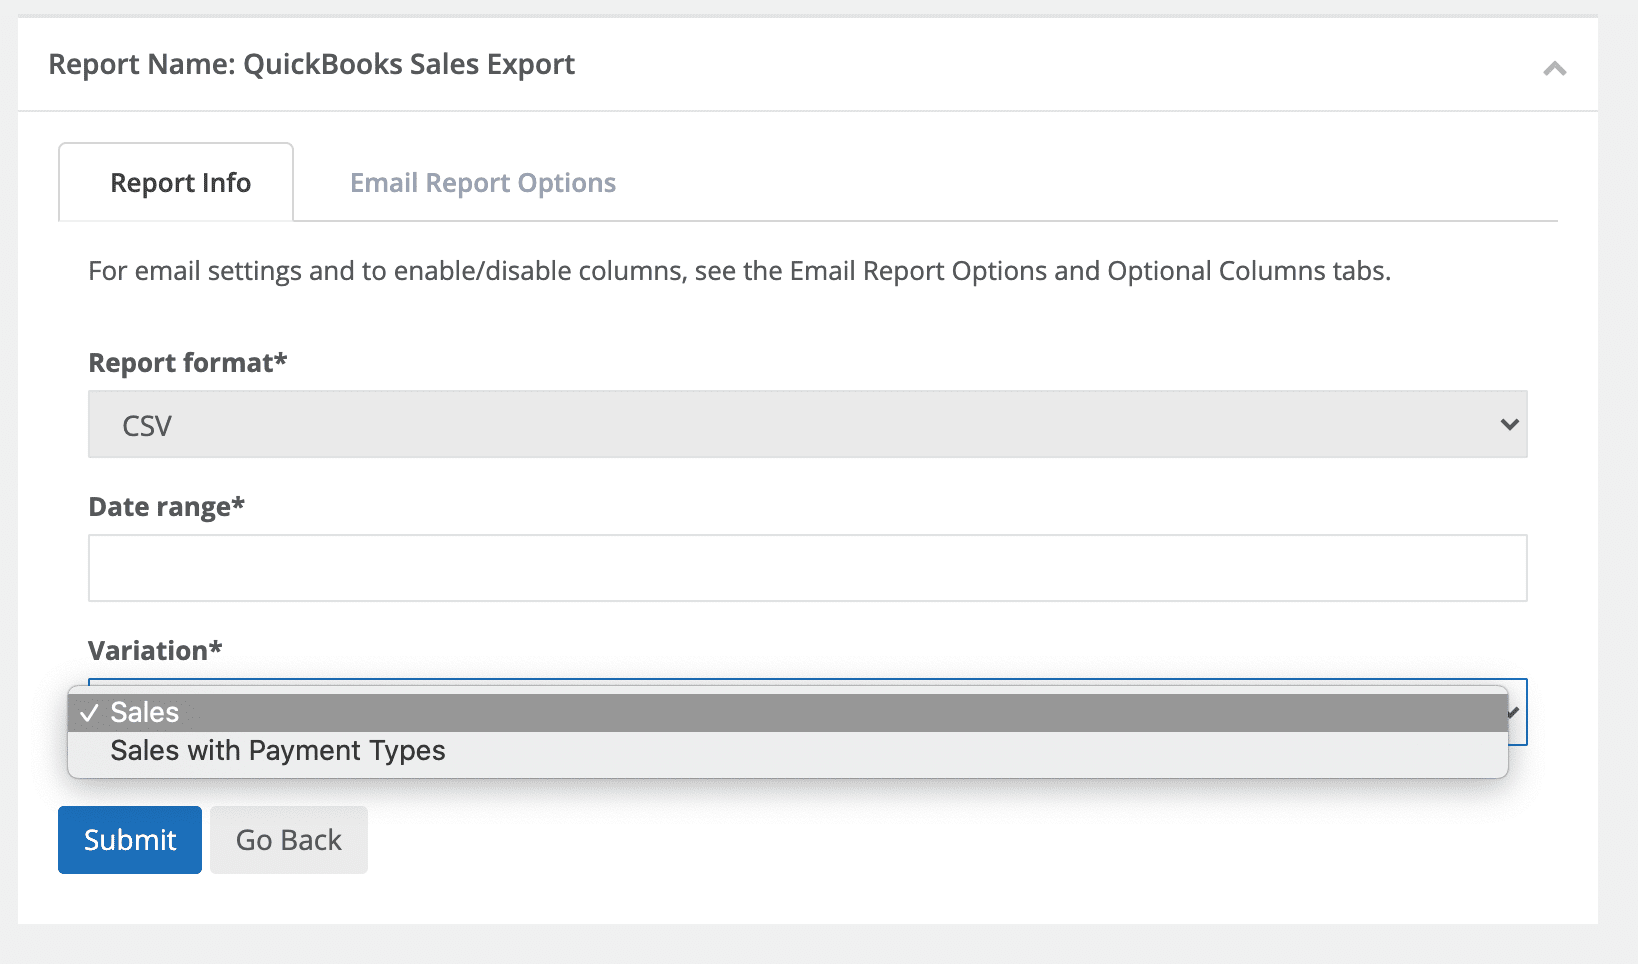
- Choose the Variation:
Sales - Importing sales may be appropriate when you use GlobalTill with accounts receivable and need visibility into due dates and manage payments within Quickbooks Online.
Sales with Payment Types - Import sales from payments may be appropriate when you operate without A/R activity, or, manage most of your A/R activity within GlobalTill. - Download the QuickBooks Sales Export from GT Reporting.
Step 2: Import the Sales Export into Quickbooks.
Heads up
This guide was last updated in November 2020 and is subject to change. For the most up to date reference, you should consult the QuickBooks help center here.
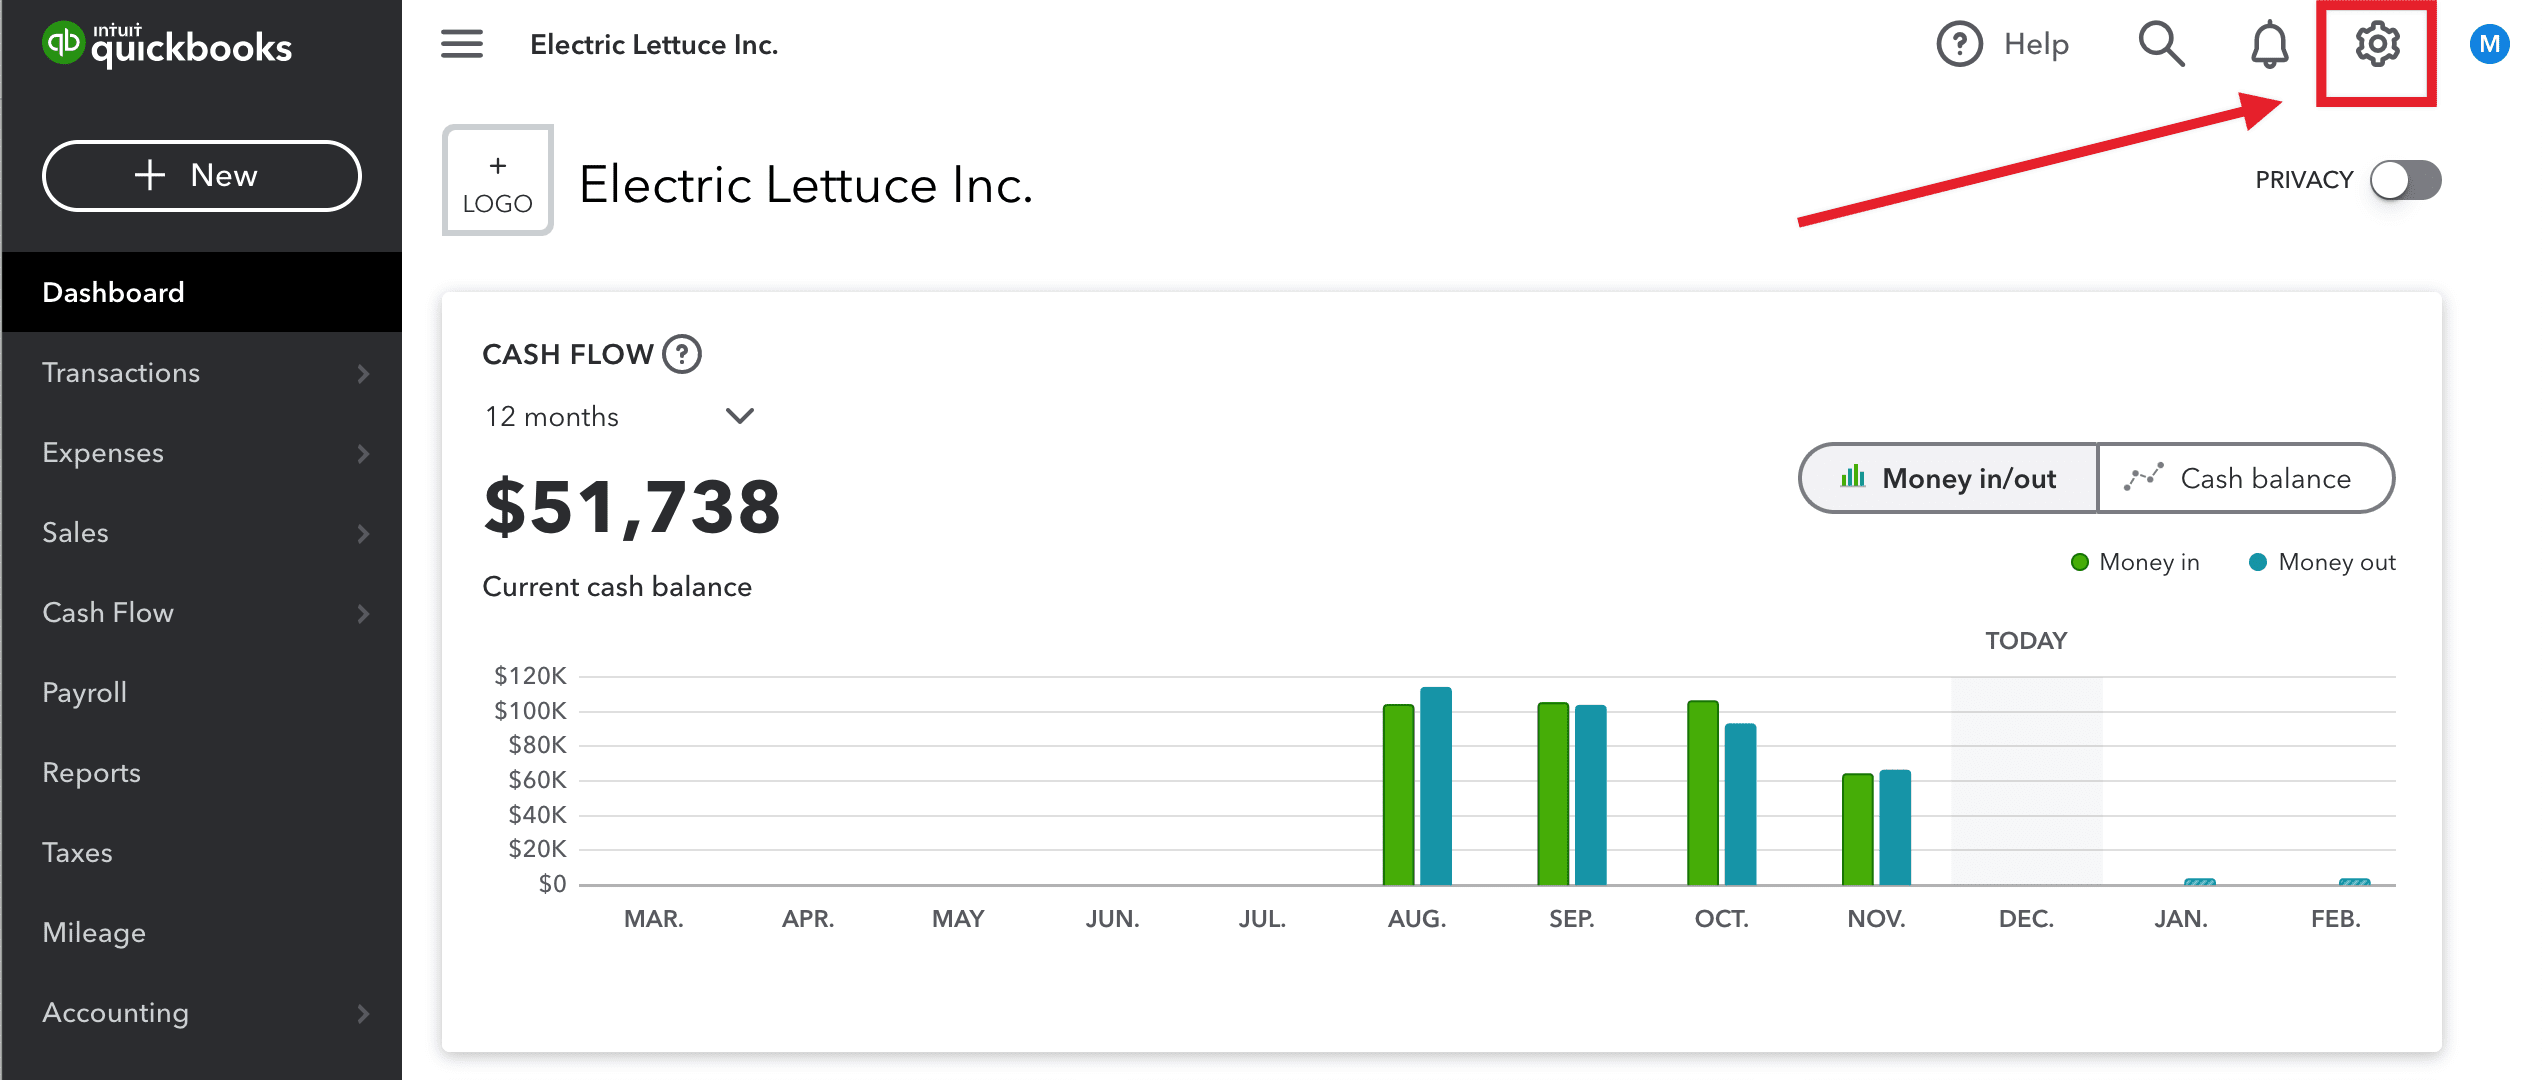
- Login to your QuickBooks Online account.
- Select the Gear icon in the top right-hand corner.
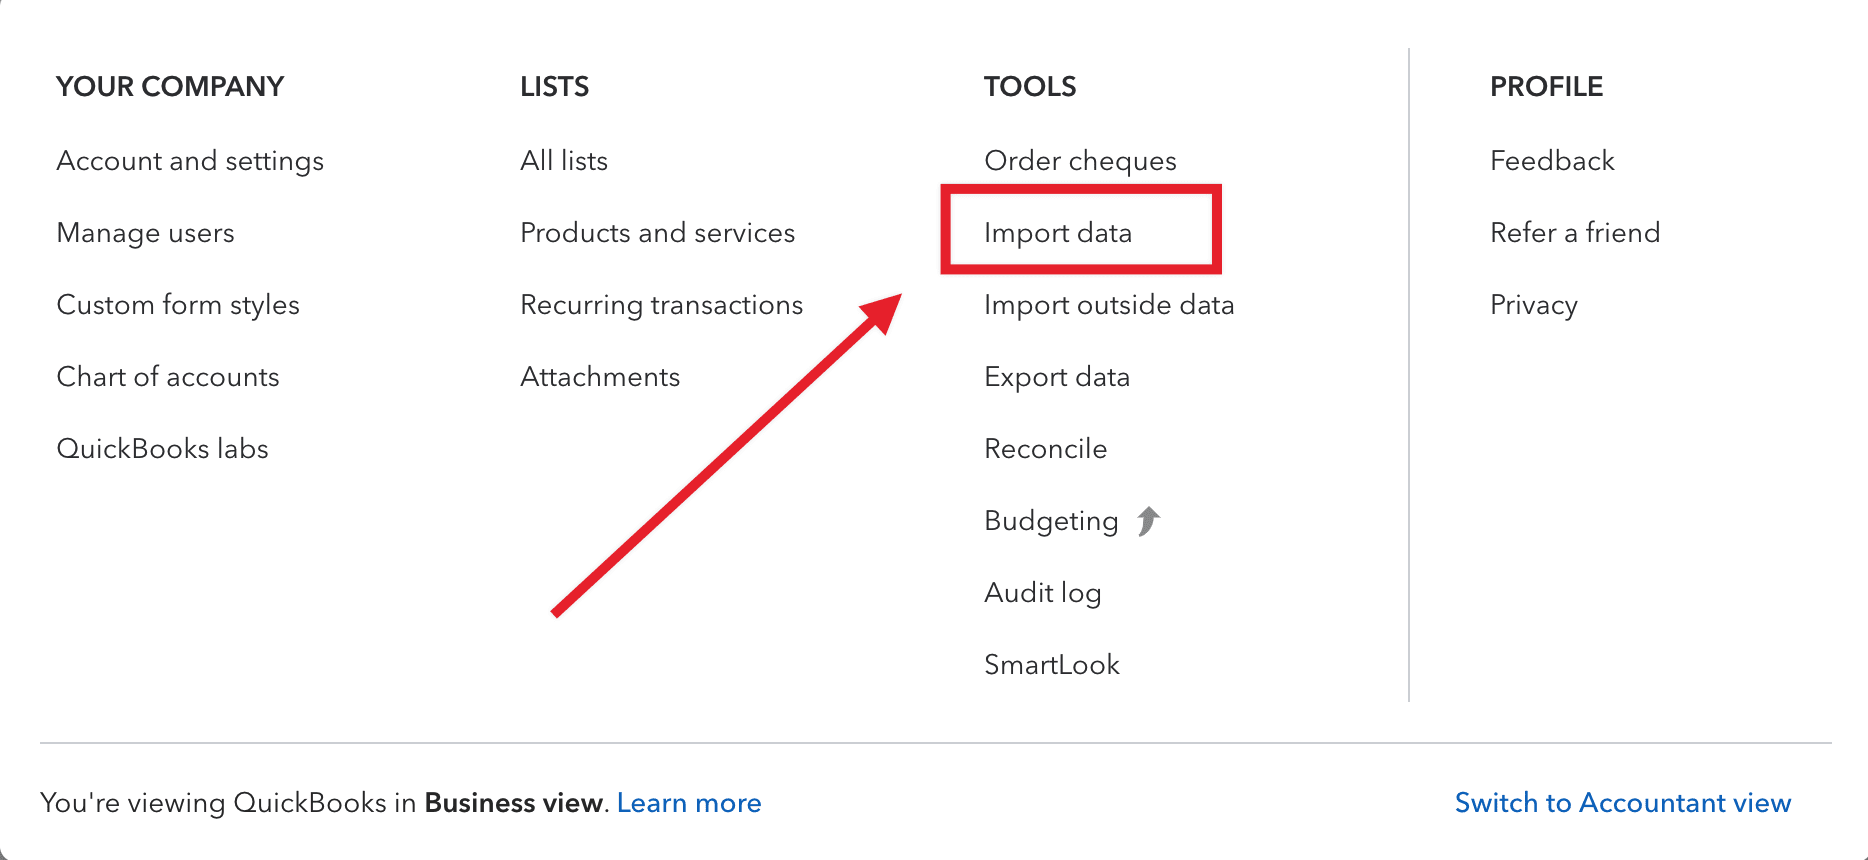
- Select Import Data.
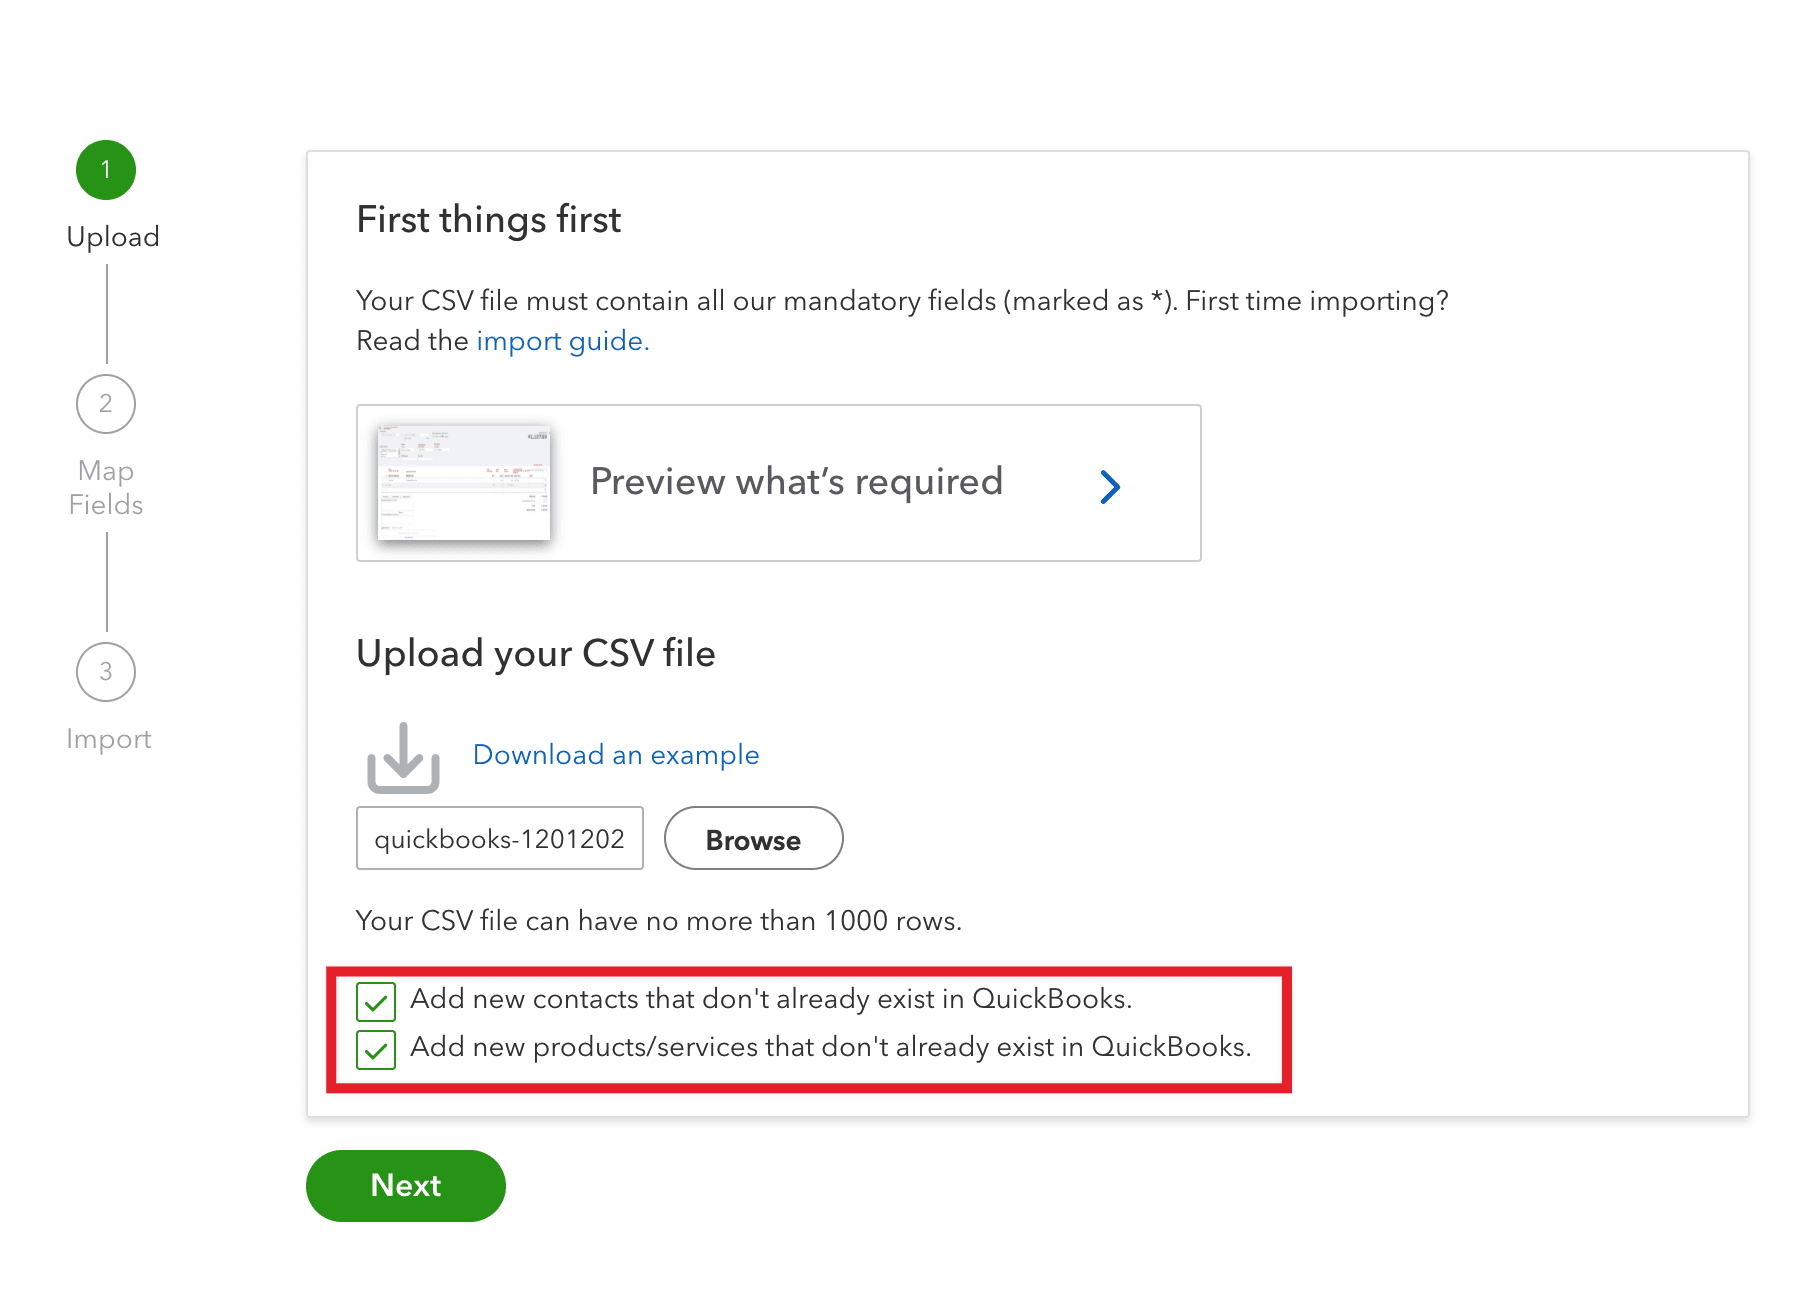
- Attach the file you downloaded in Step 1.
- Check Add New Contacts.
- Check Add New Products/Services if it is applicable to your setup.
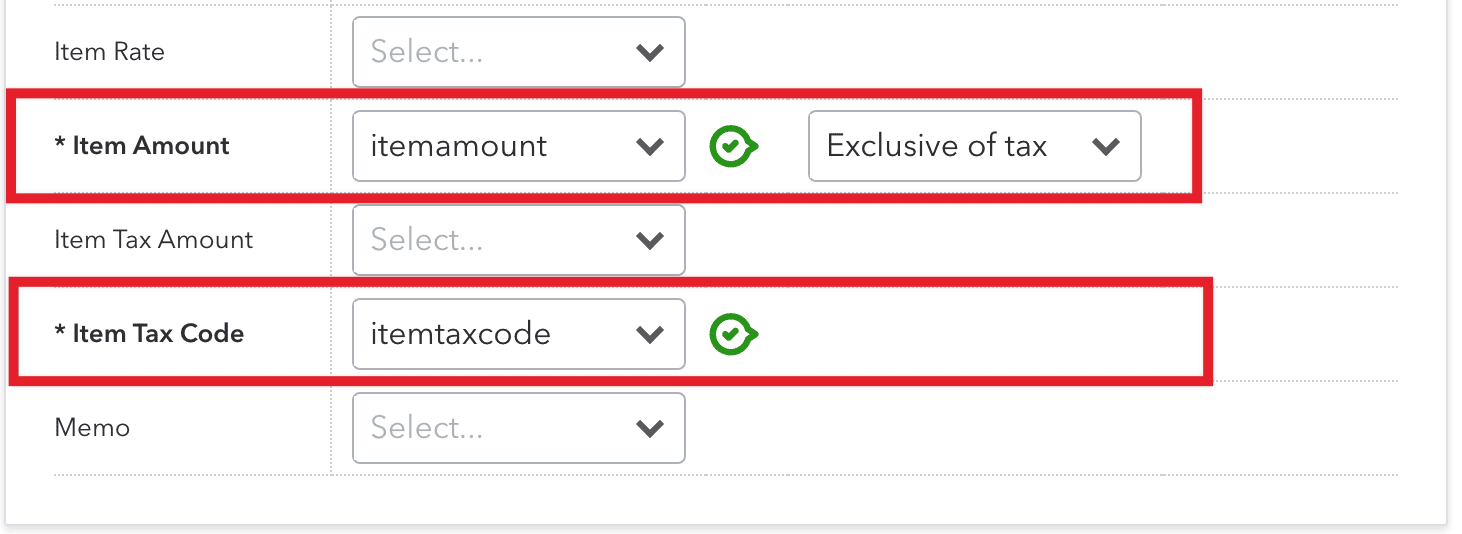
- Follow the provided instructions to map your column headings.
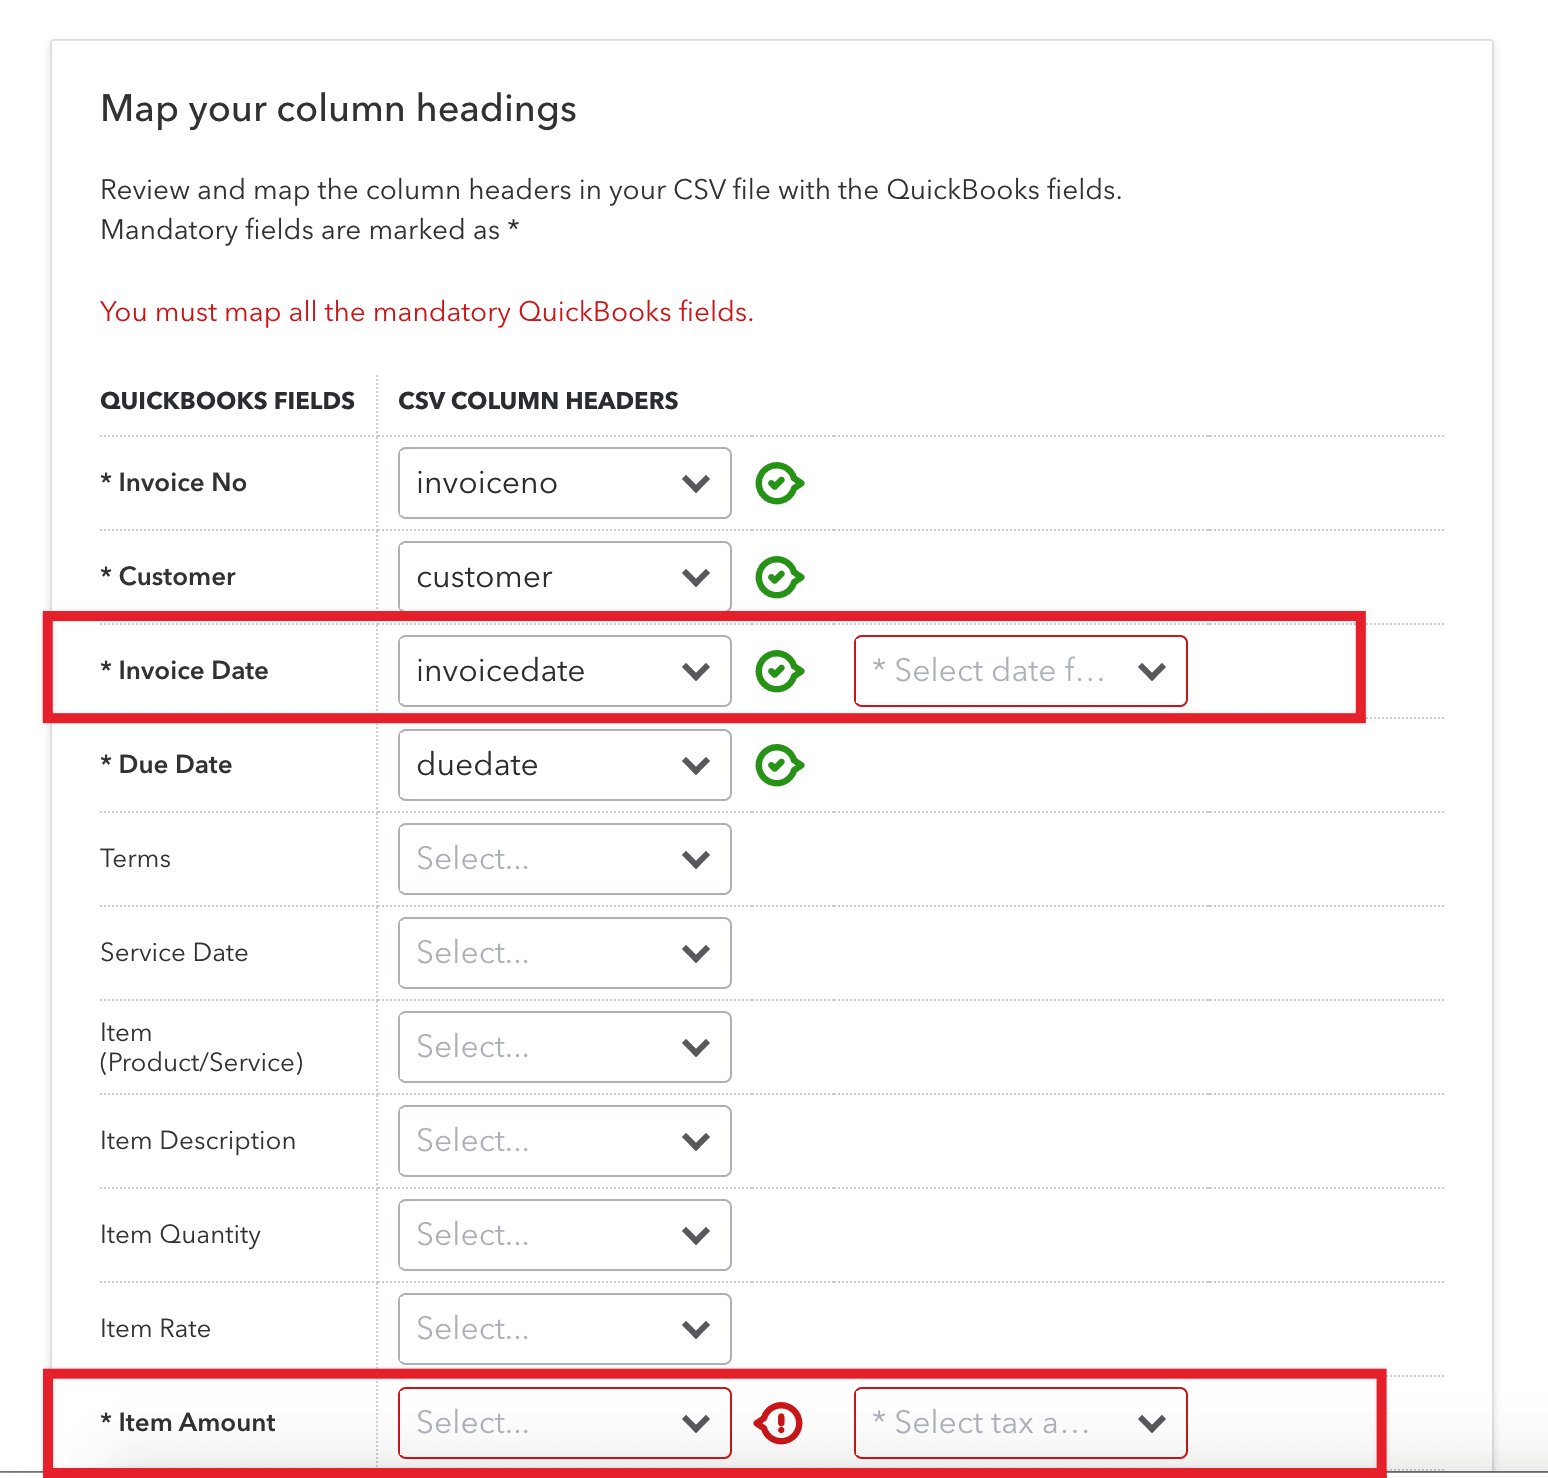
- The date format should be YYYY-M-D.

- Because the QuickBooks export is without tax, you should select Exclusive of Tax.
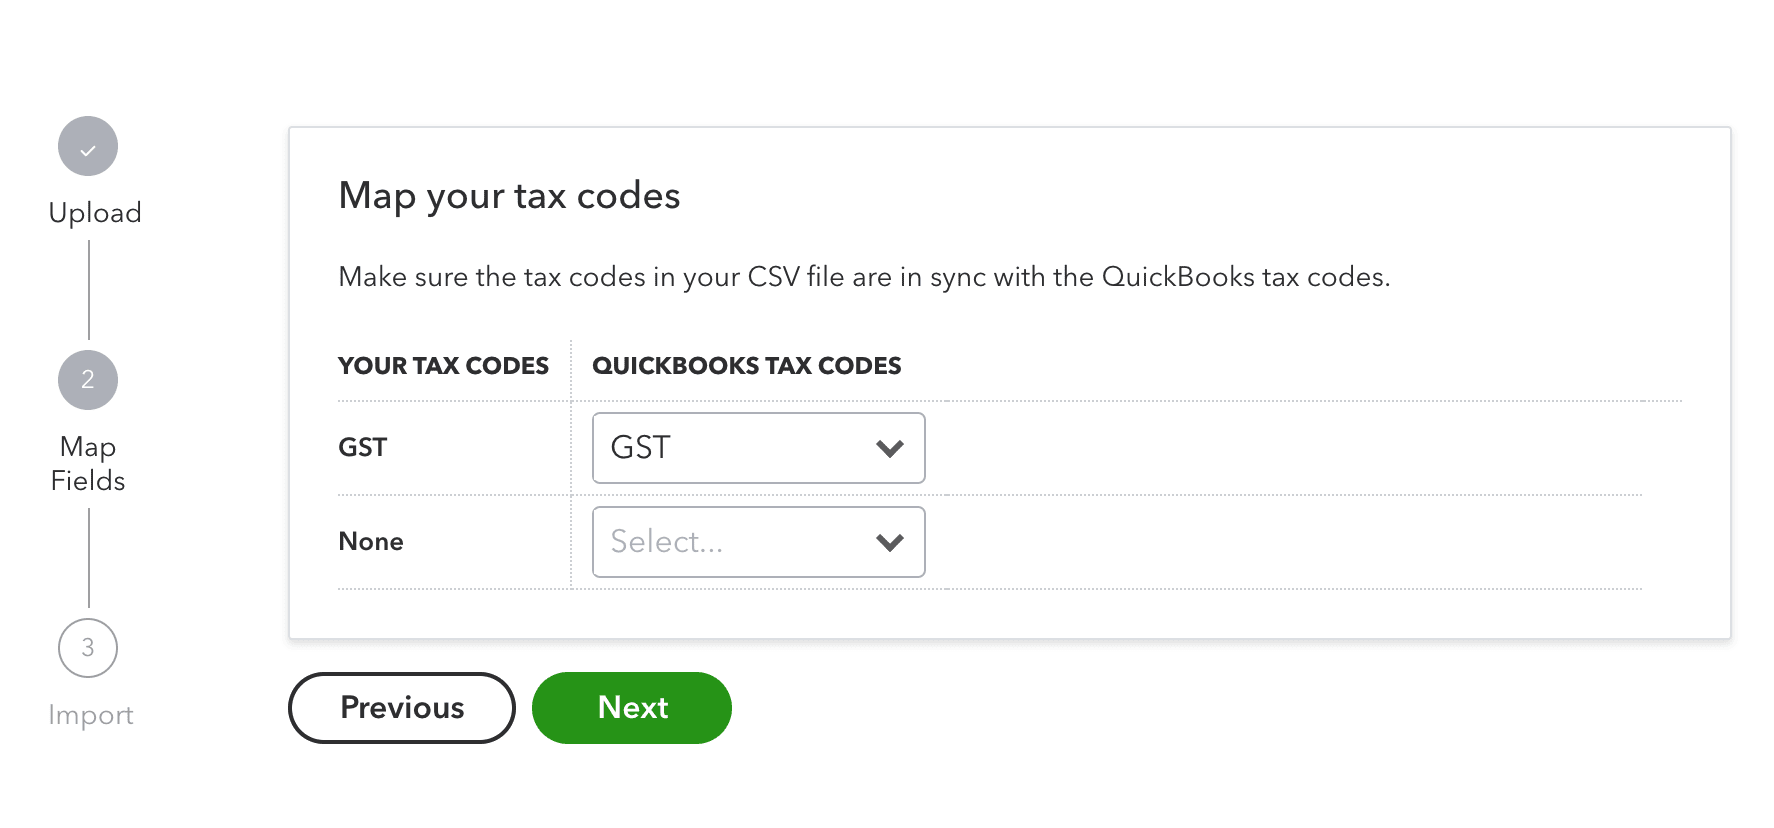
- Follow the provided instructions to map your tax codes.
- Confirm the import details and select Start Import.
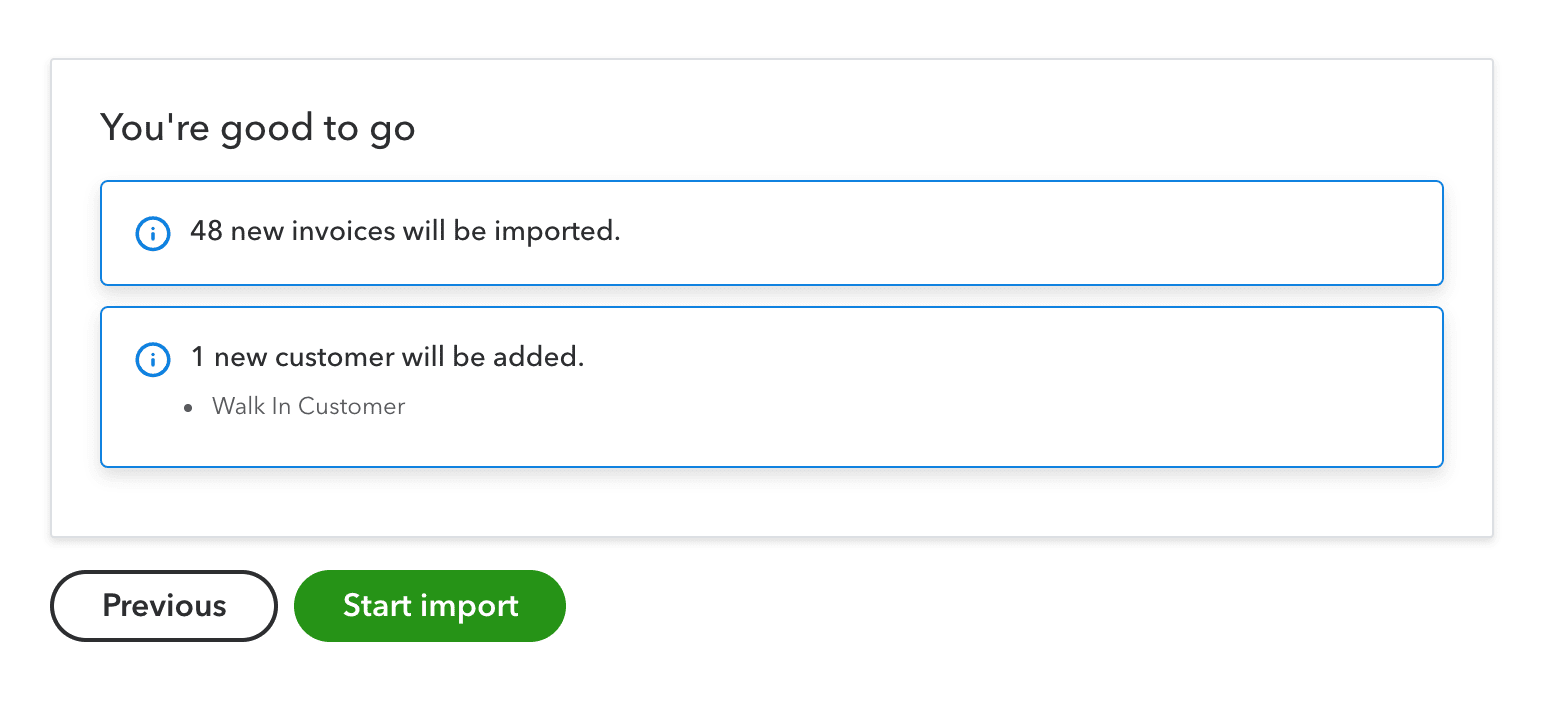
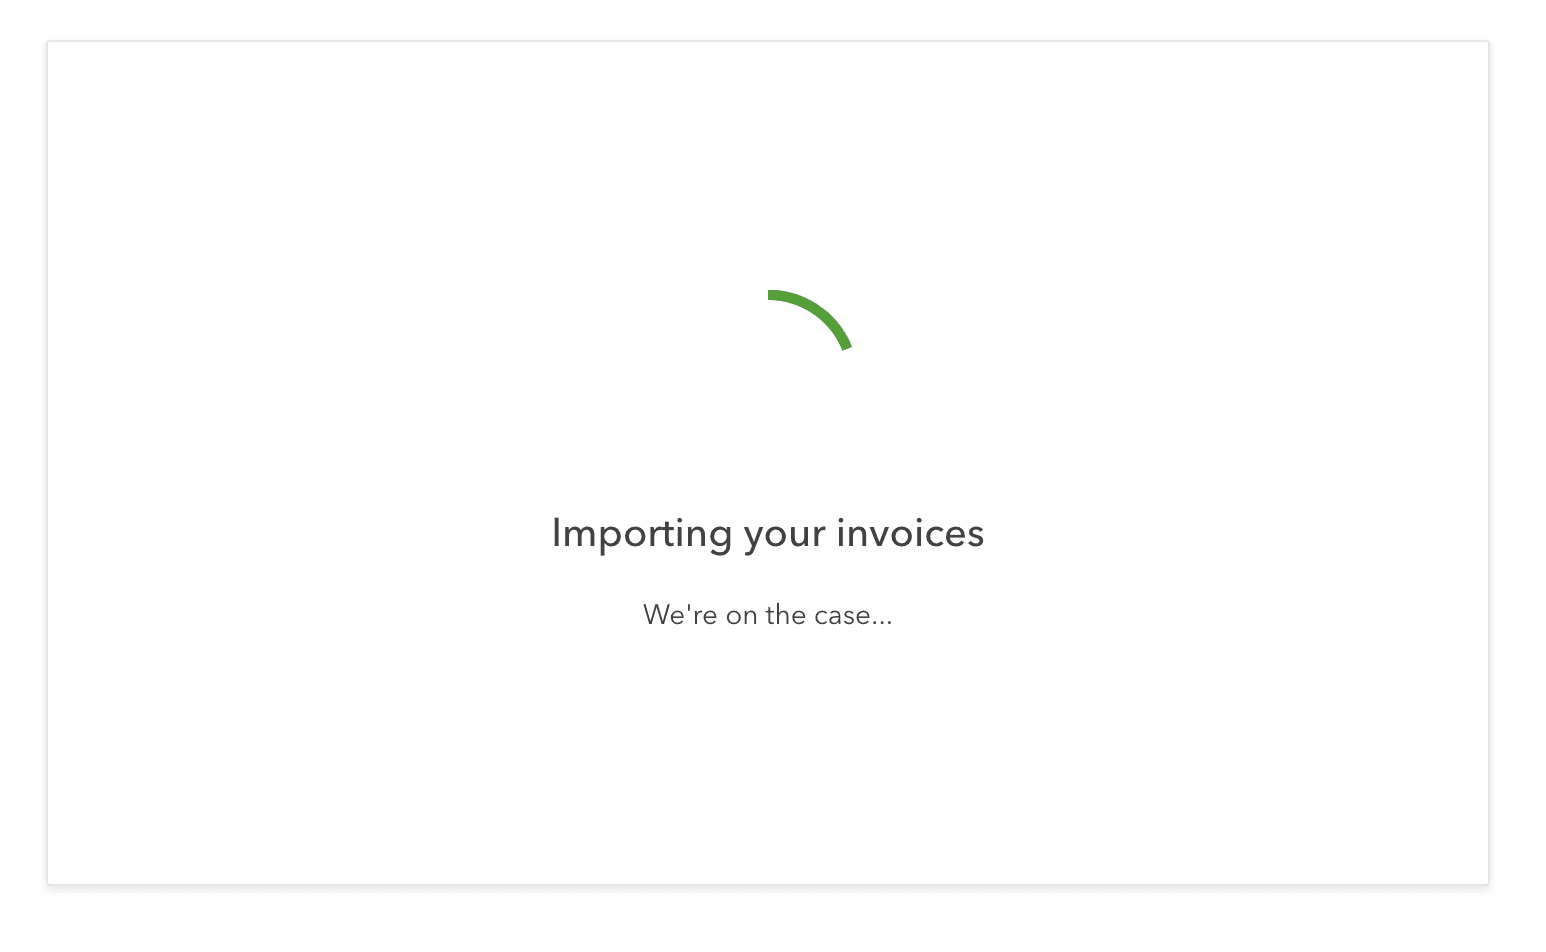
- The import should start and you should see an importing screen.
- Finally, you should see a success message from QuickBooks Online.


Comments
Please sign in to leave a comment.